Creating 3Dmodels ; pencil
How to make pencil
I will make 3Dmodel pencel by FreeCAD on this page.
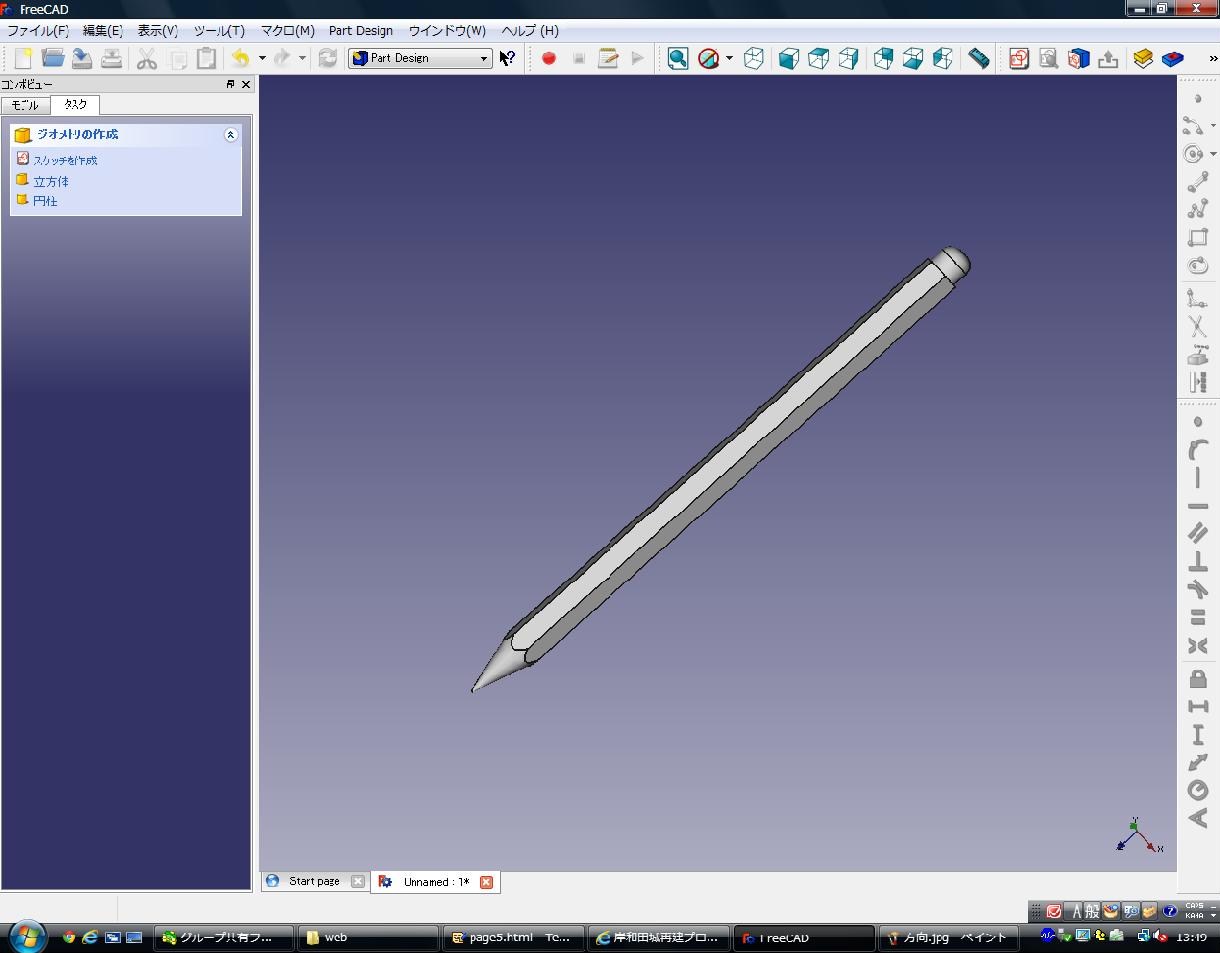
First I will show you completion of pencel which we will make this time.
Then we `ll make a sketching
At first you select“Sukecchi wo sakusei(Create sketch)” and decide the flat which you will make.
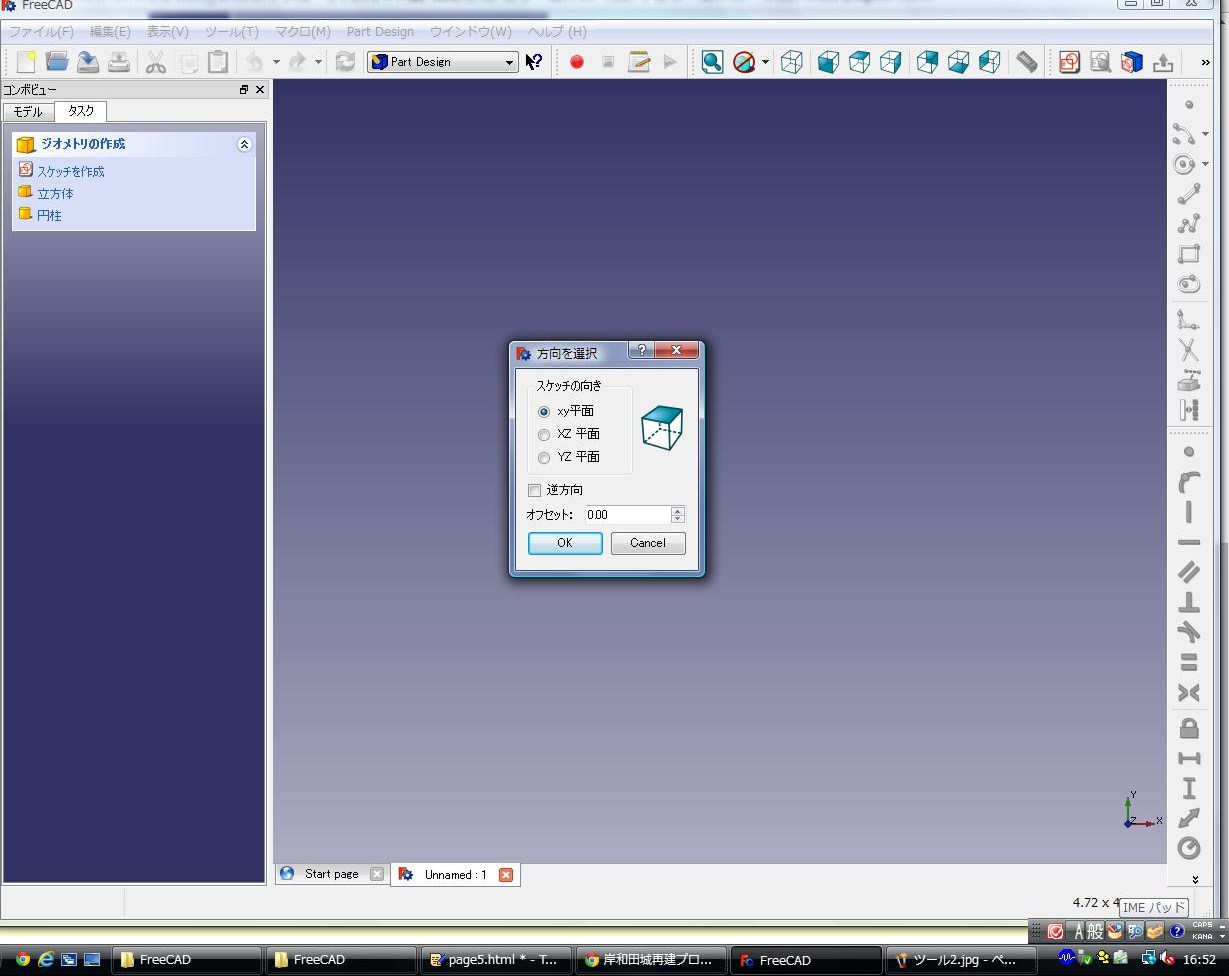
You select “XY flat” on this time.
I talk change ,I`ll explain about 3Doperation be need you use.
Left-click on mouse is called “selection”
You move mouse leave putting the mouse wheel(a button on a center of the mouse),
cursor will move parallel along the over the flat you operating.
You can expand and shrink by operates mouse wheel up and down.
When you click left-click leave putting mouse wheel,
the 2D-sketch is turn around the point you clicked and be 3D.
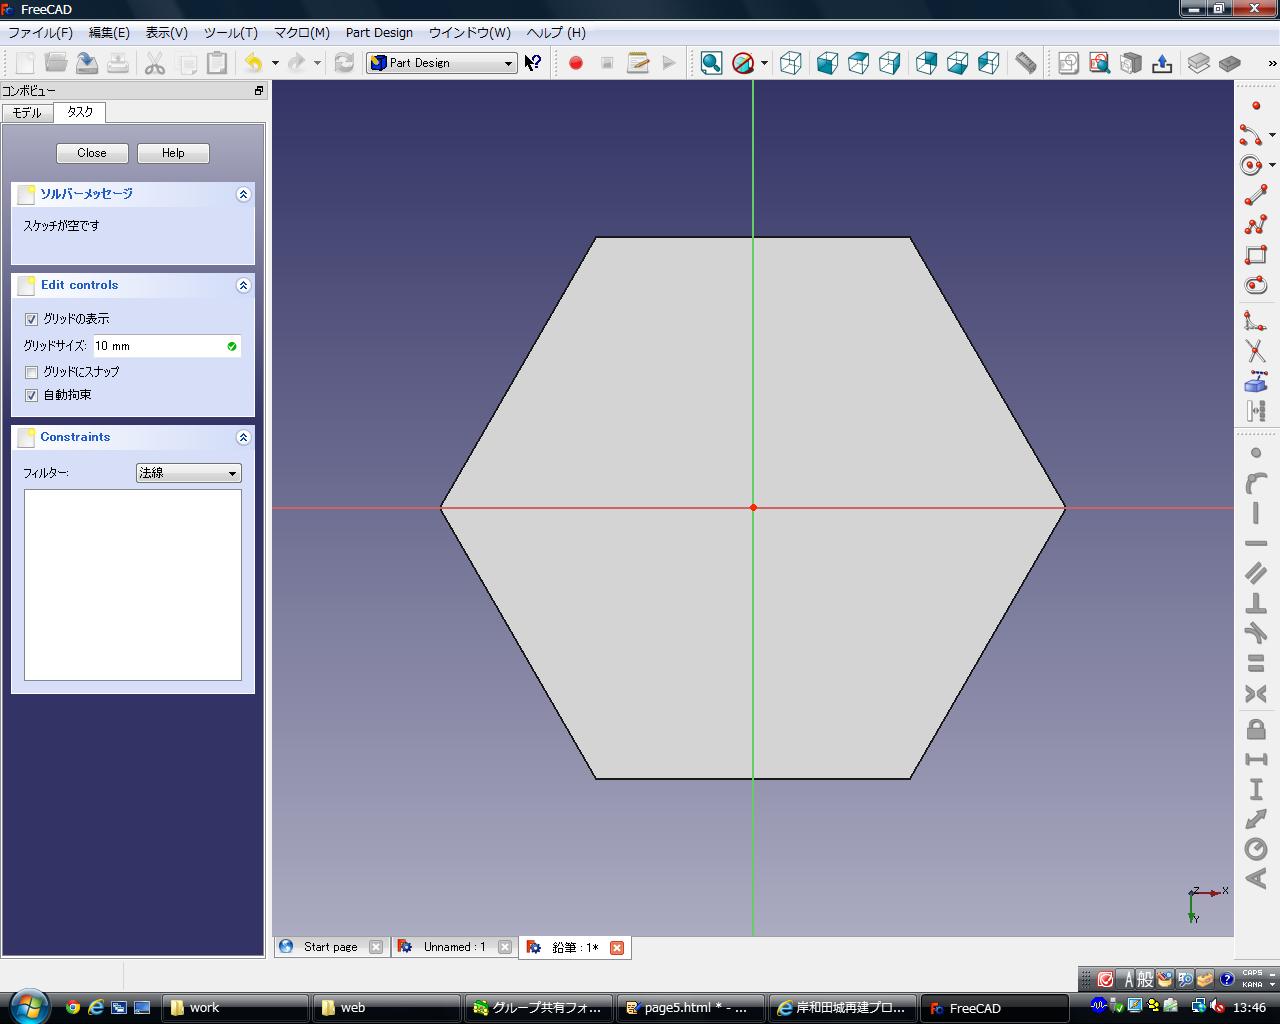
It has continued a hexagon like this.
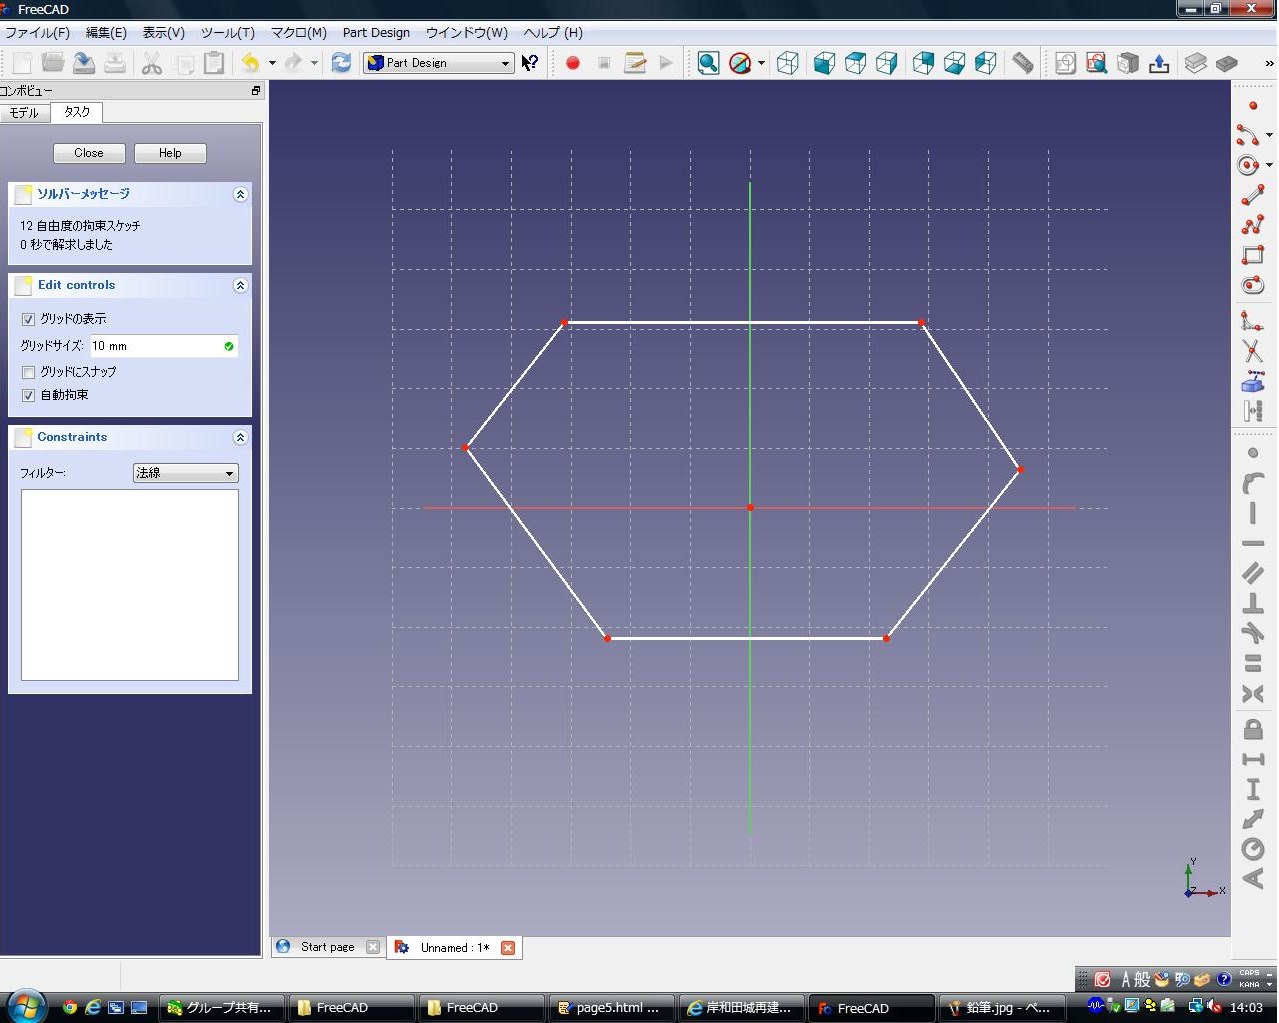
You will use “pori line sakusei (create a polyline)”there is fifth item on right side ture.
You don`t forgetsurerimpose end point of the line and starting pointthis time.
Next you fix a length of the side.
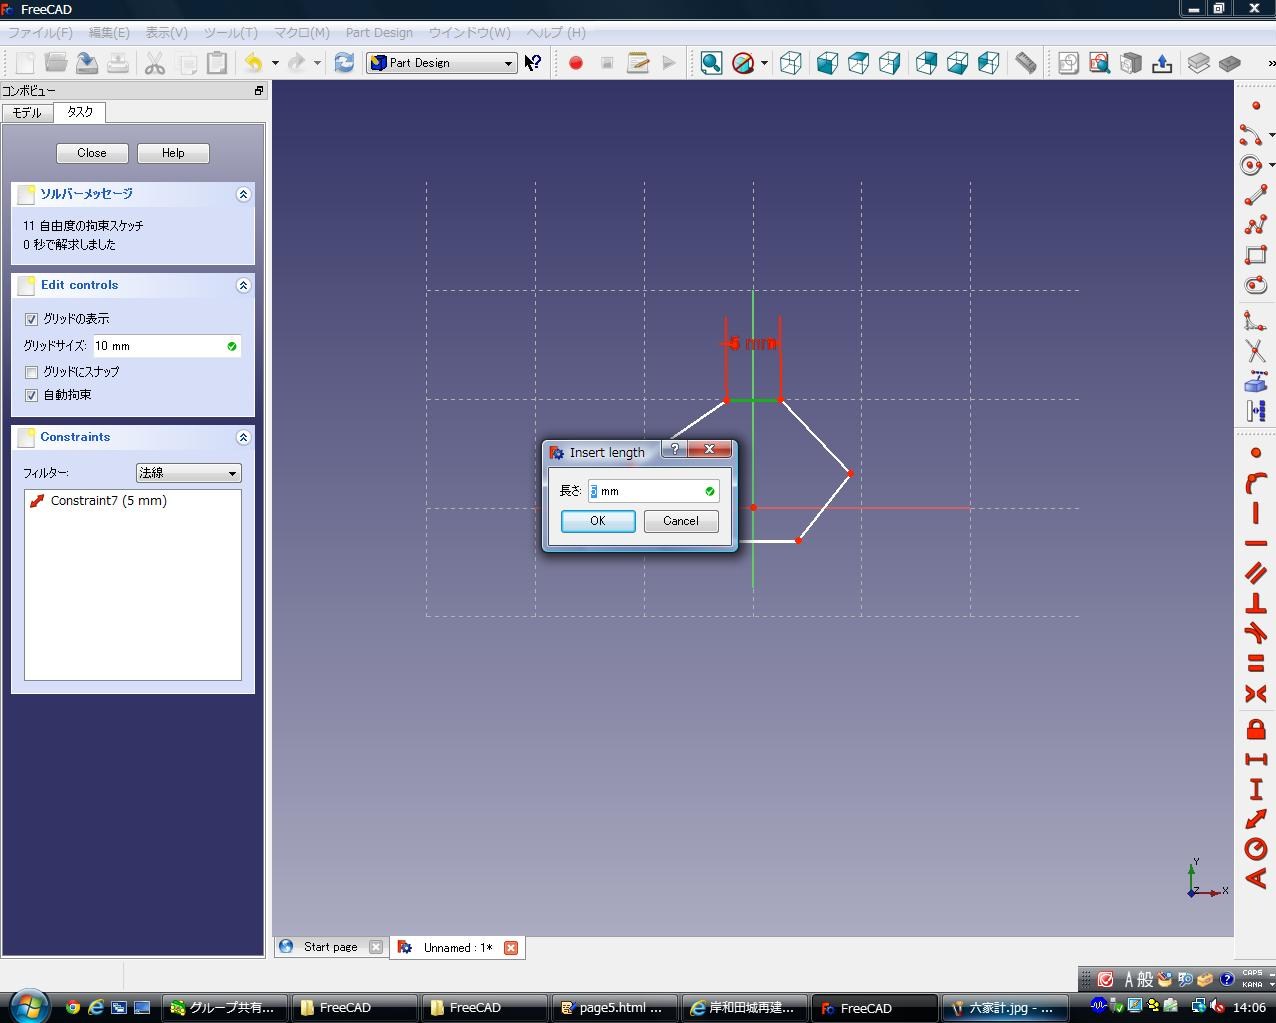
All of sixth sides fix 5mm.
And you select two sides be adjacented ,and fix the angle degrees.
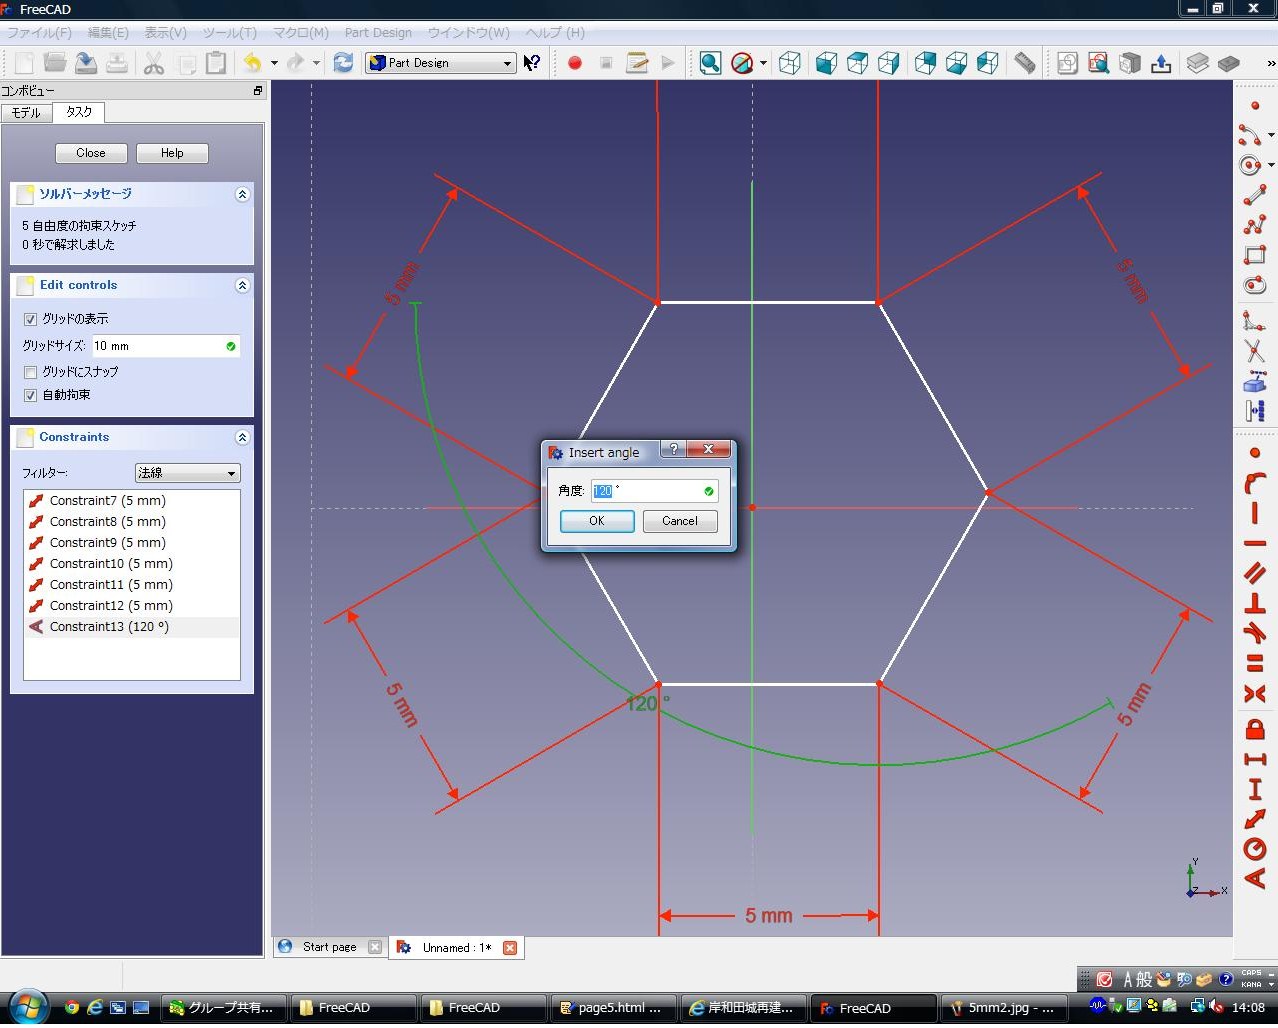
These are need to fix three places.
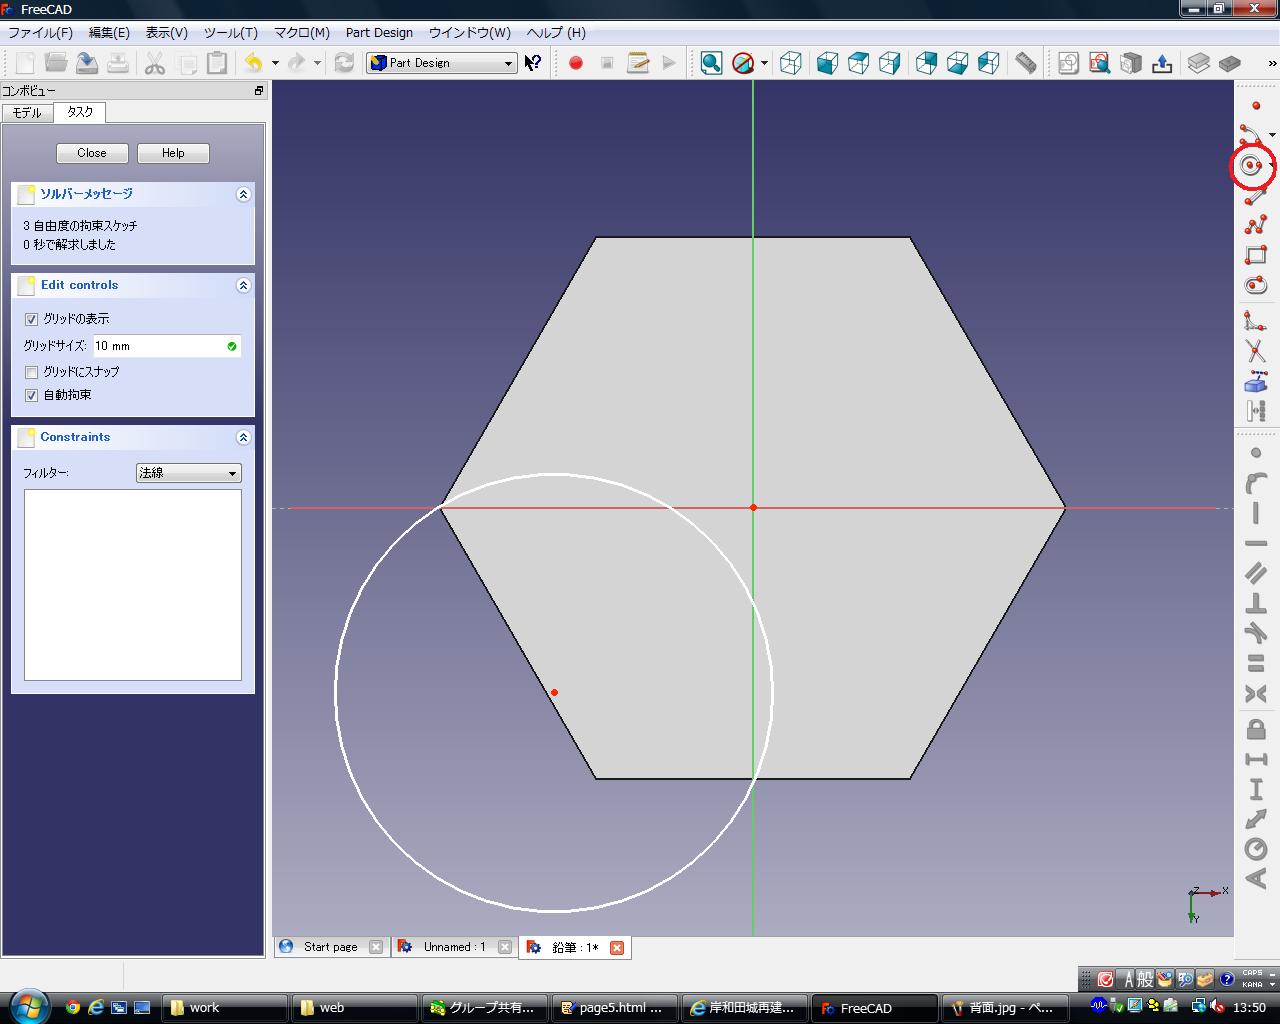
You fix the position of hexagon from here.
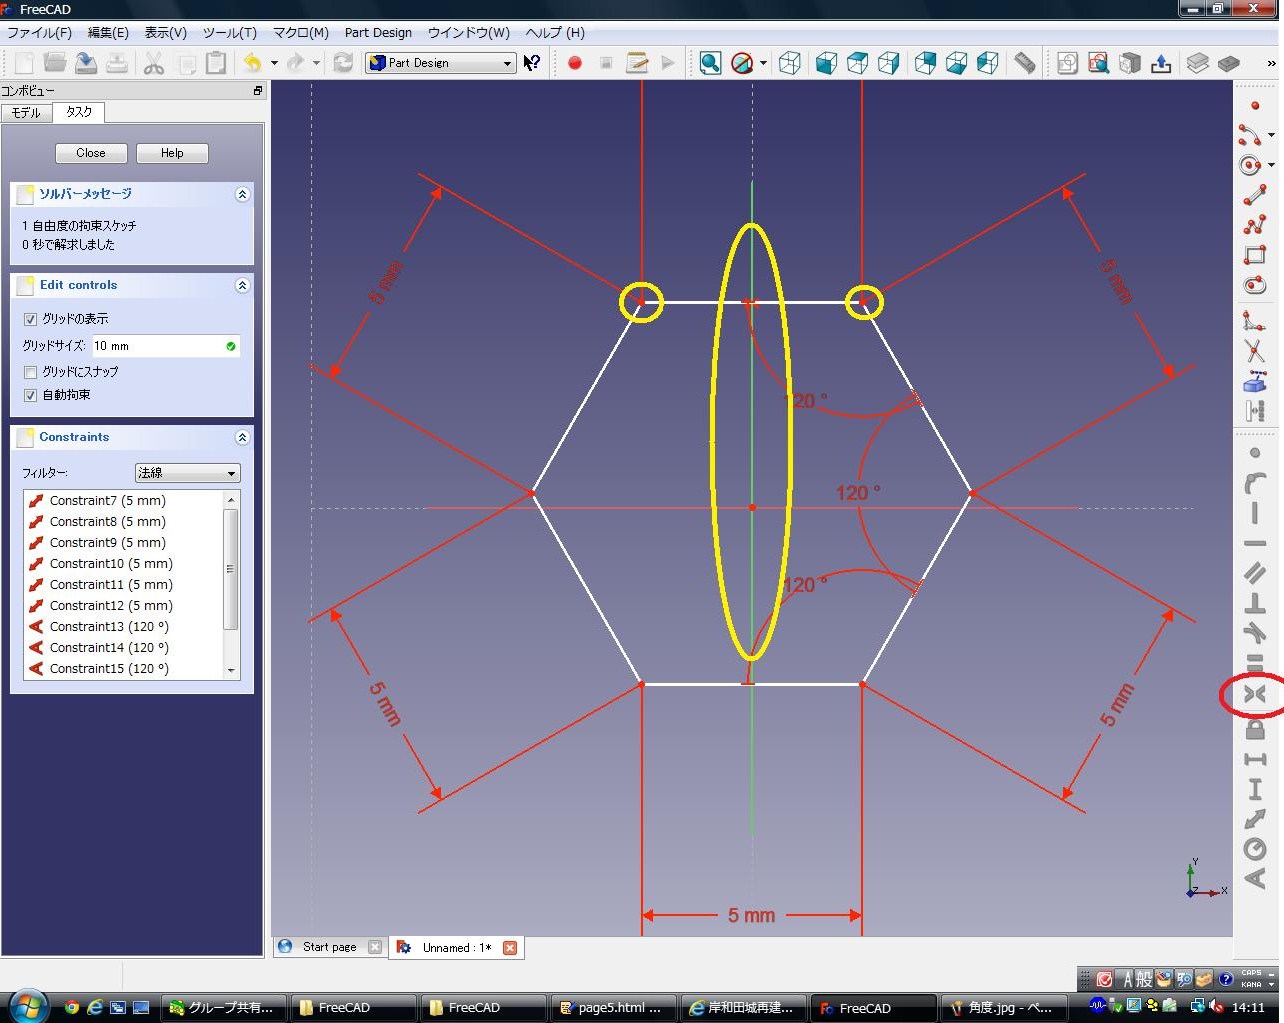
You select two point and Y-axis these be shown ,and select ture be shown.
By this Y-axis is fixed middle of two points.
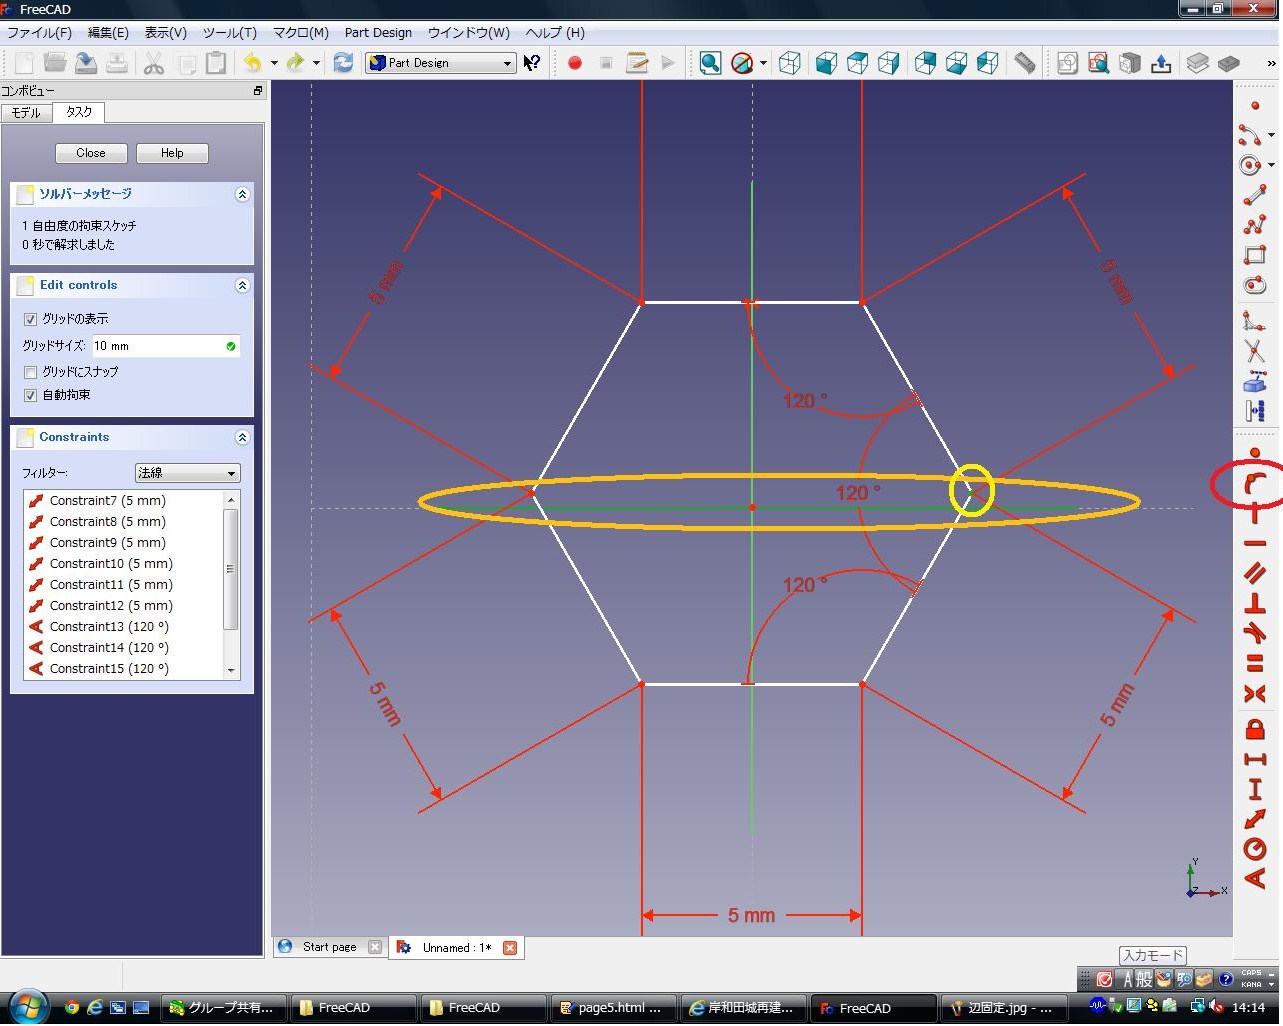
Youselect a point be shown and X-axis .
By this you can fix the selected point on selected line.
When it shown “kannzen kosoku(Fully constrained)”,you select “close”,and select “oshidashi(Pad)”.
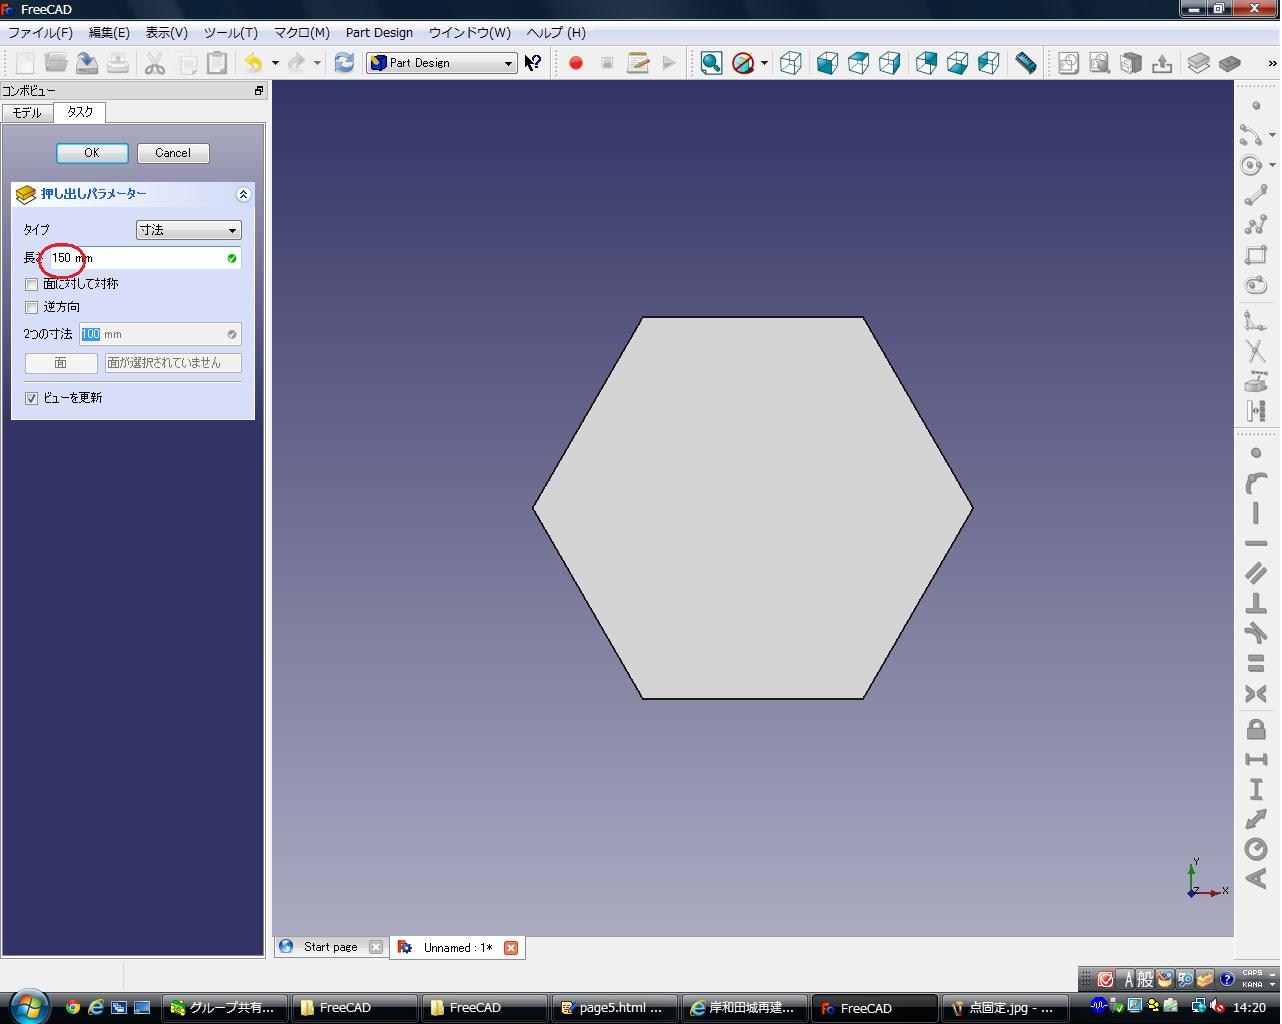
You change numerical value 150,and select “OK”.
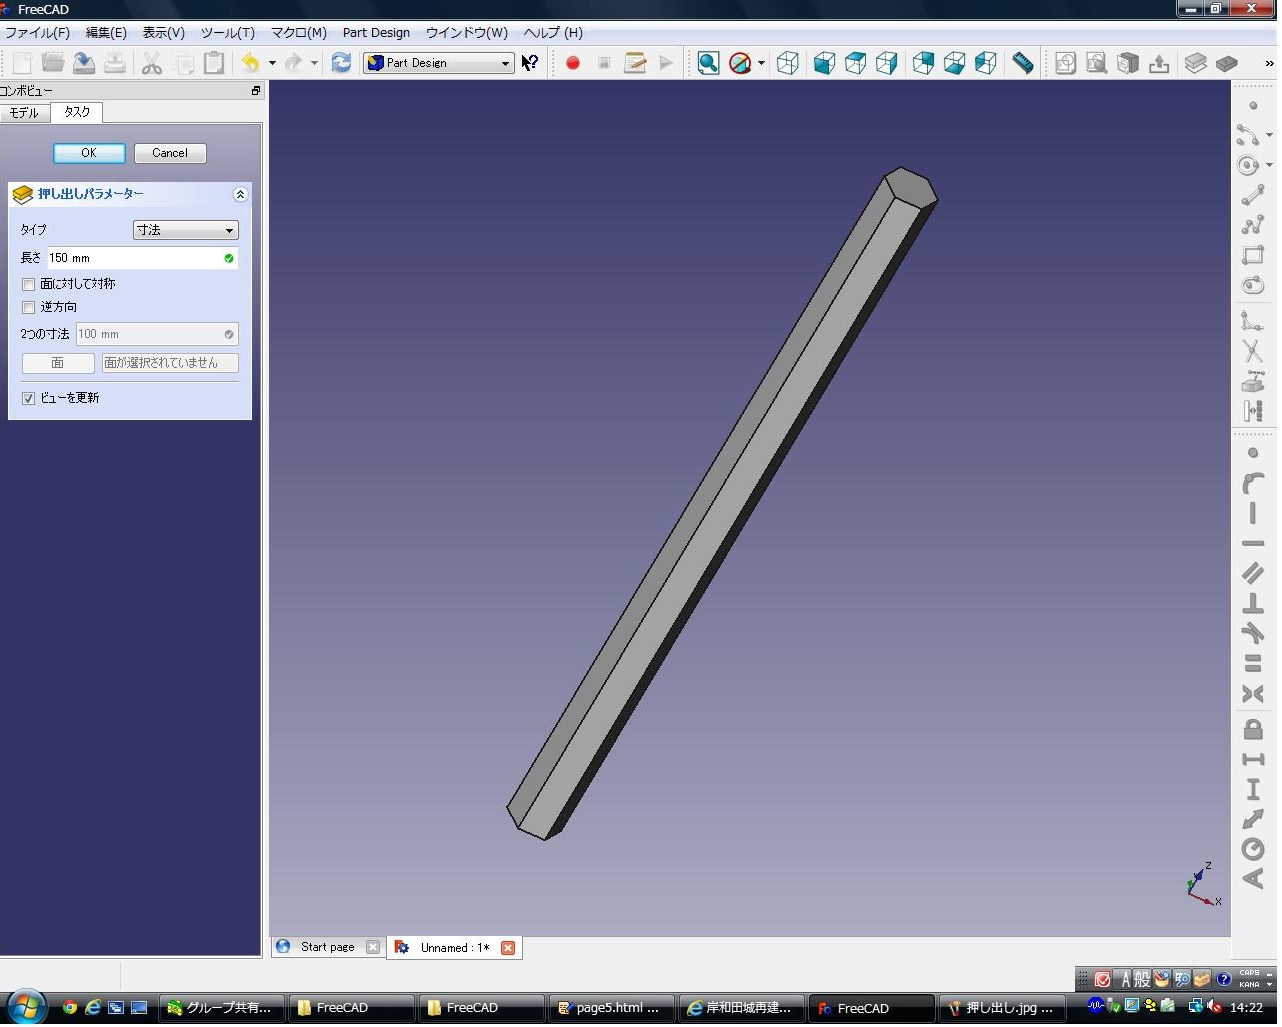
When this occurs, it is once completed.
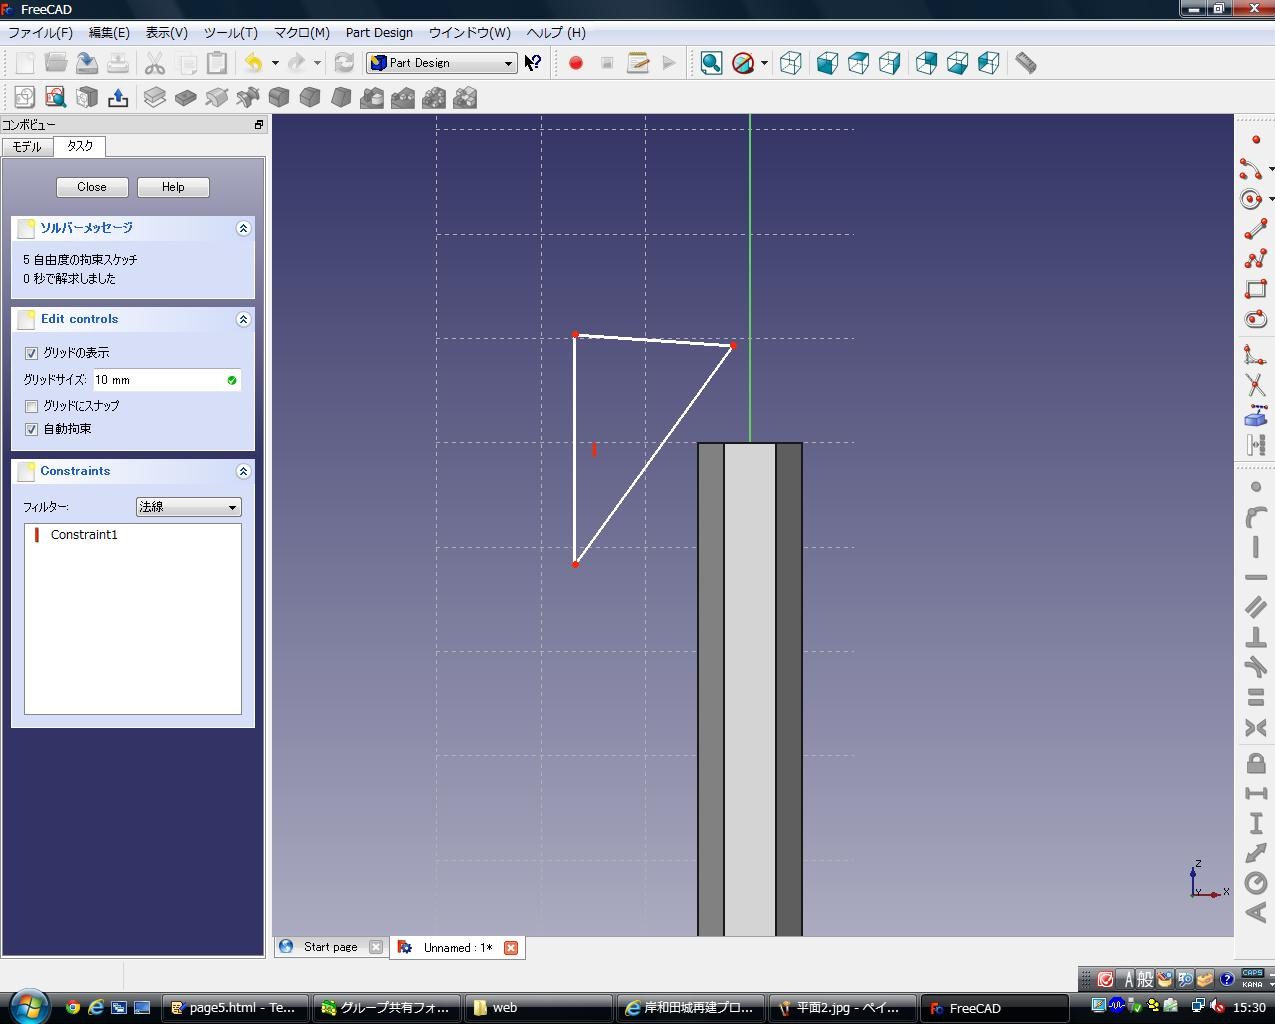
Then, to shave the pencil tip.

To select ‘’produce a sketch’’ , and ‘’XZ plane’’.
First, to make a triangle as shown.
Then, to set the horizontal side to 6mm, and the vertical side to 21mm, and to right angle between side and side.
Then, to use tools that are shown, and to set between the lower end of the triangle and X-axis to 130mm.
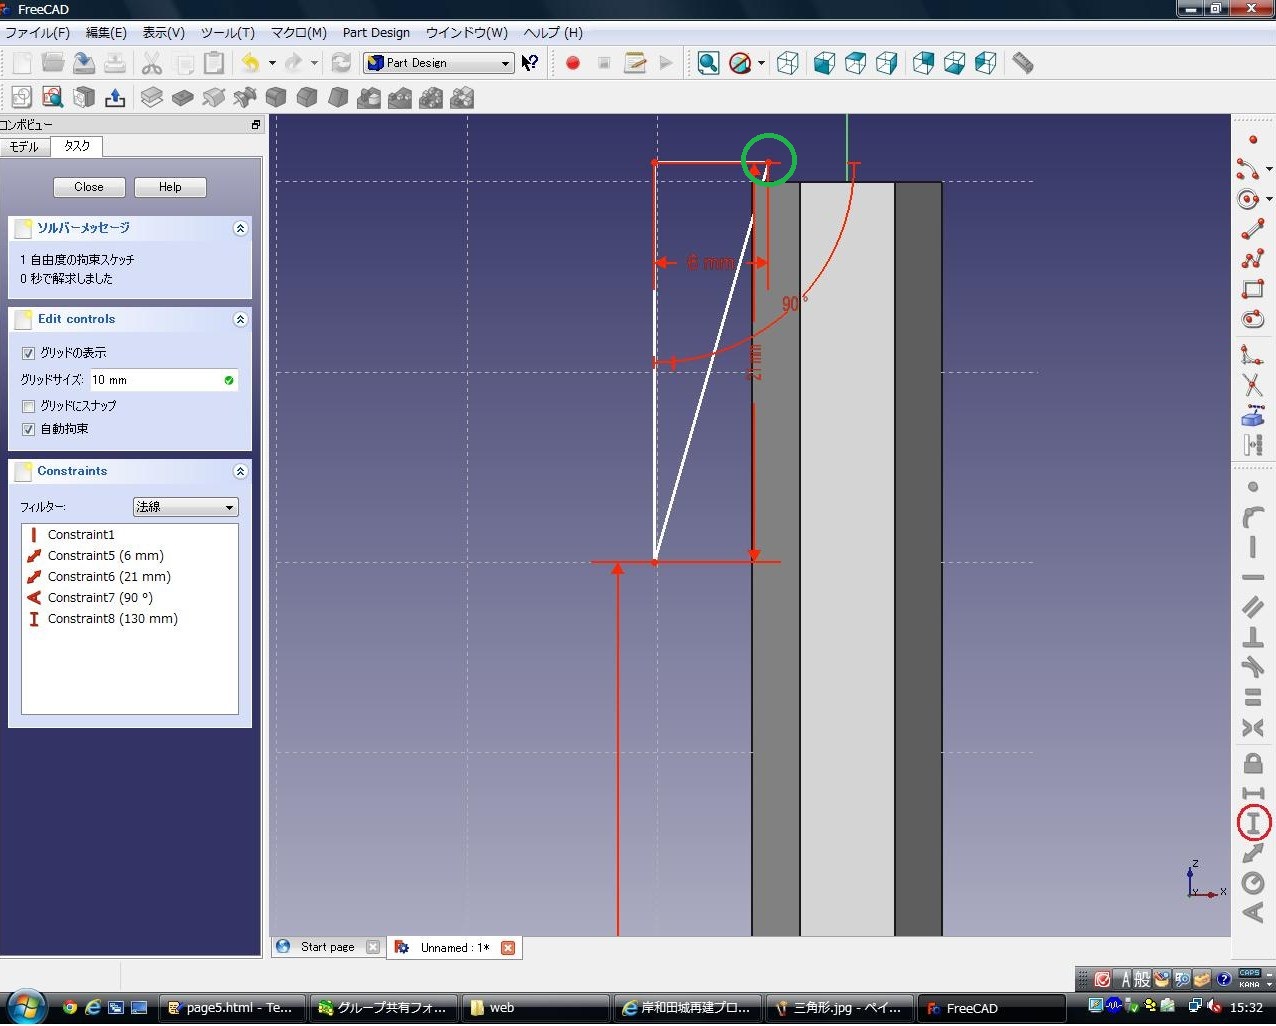
To fasten a point that are shown to Z-axis.If it became a full restraint, and then choose ‘’close’’.
Next time, to select ‘’rotating body’’, and to select ‘’OK’’.
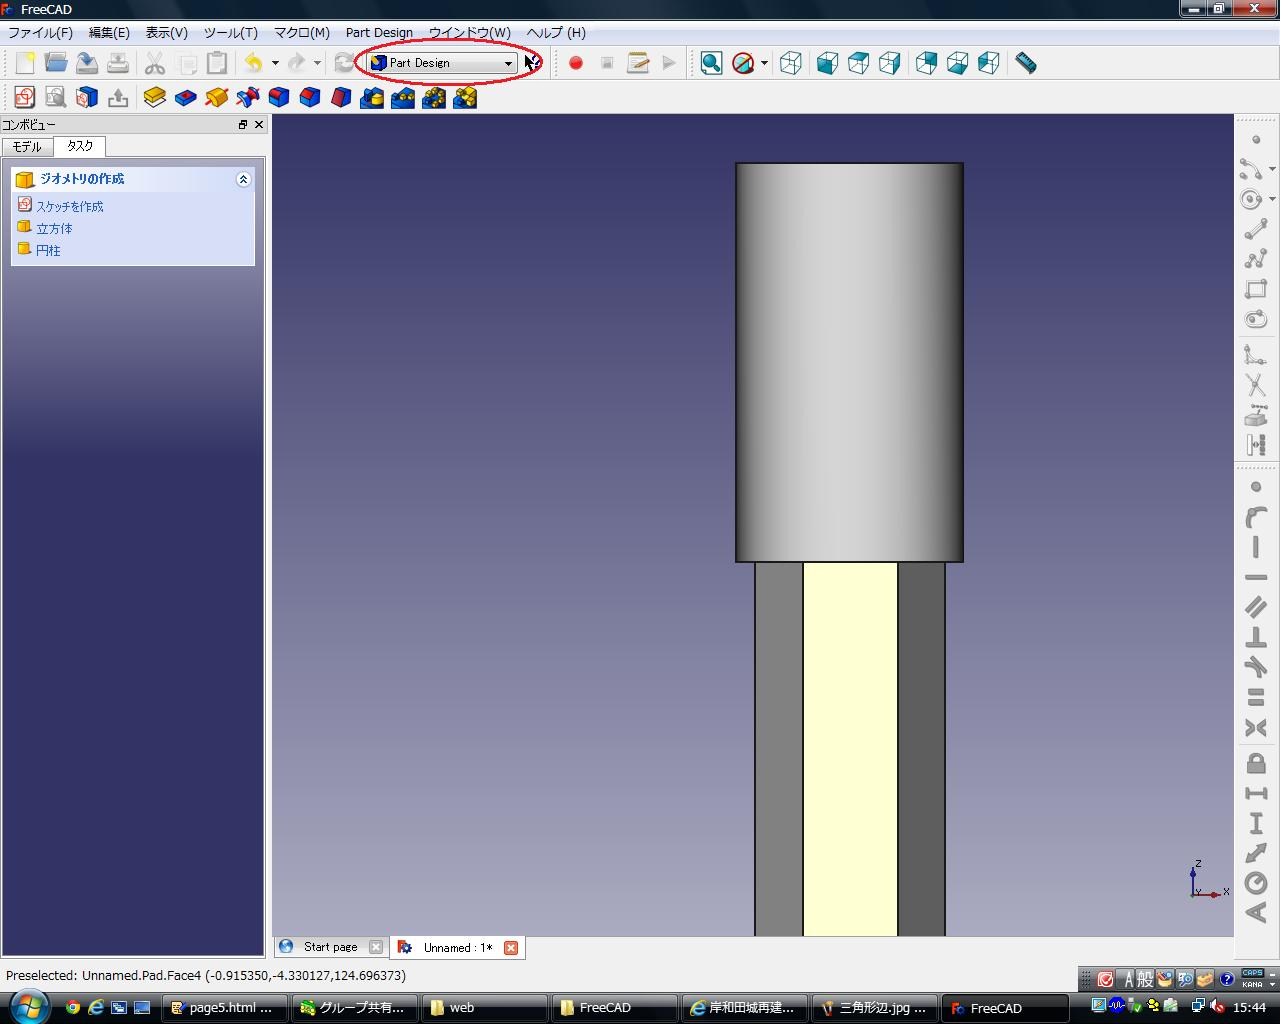
As a result, it become this way.Then, to select place that are shown, and
to select ‘’Part’’.
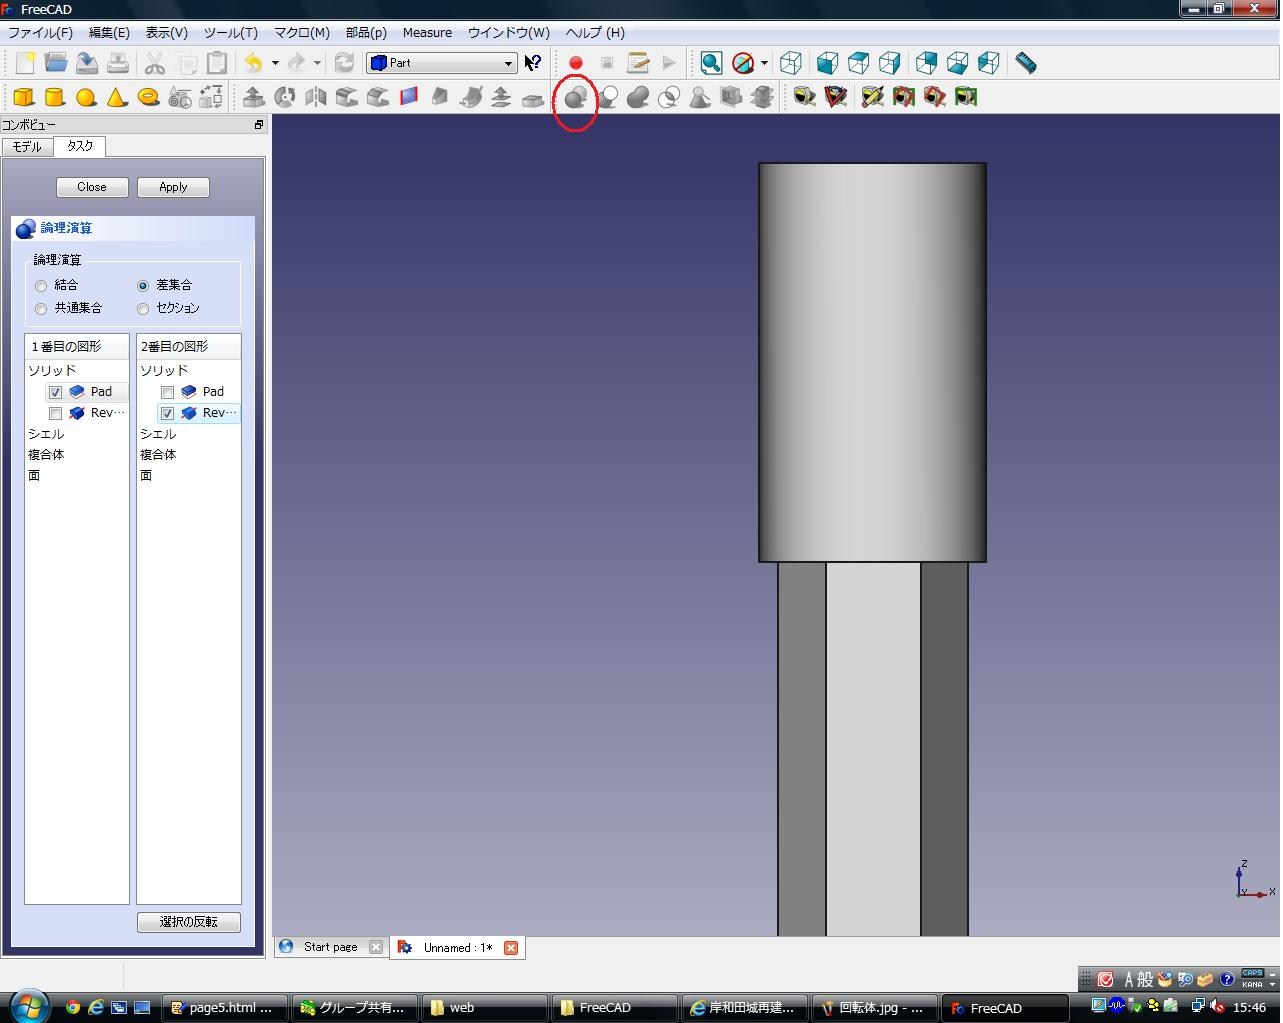
Please choice the tool pointed, andcrick “差集合(Difference) ”at the left of the screen.
Put “PAD” into the left space, and put “REVORUTION” into the right space,
and crick “apply”.
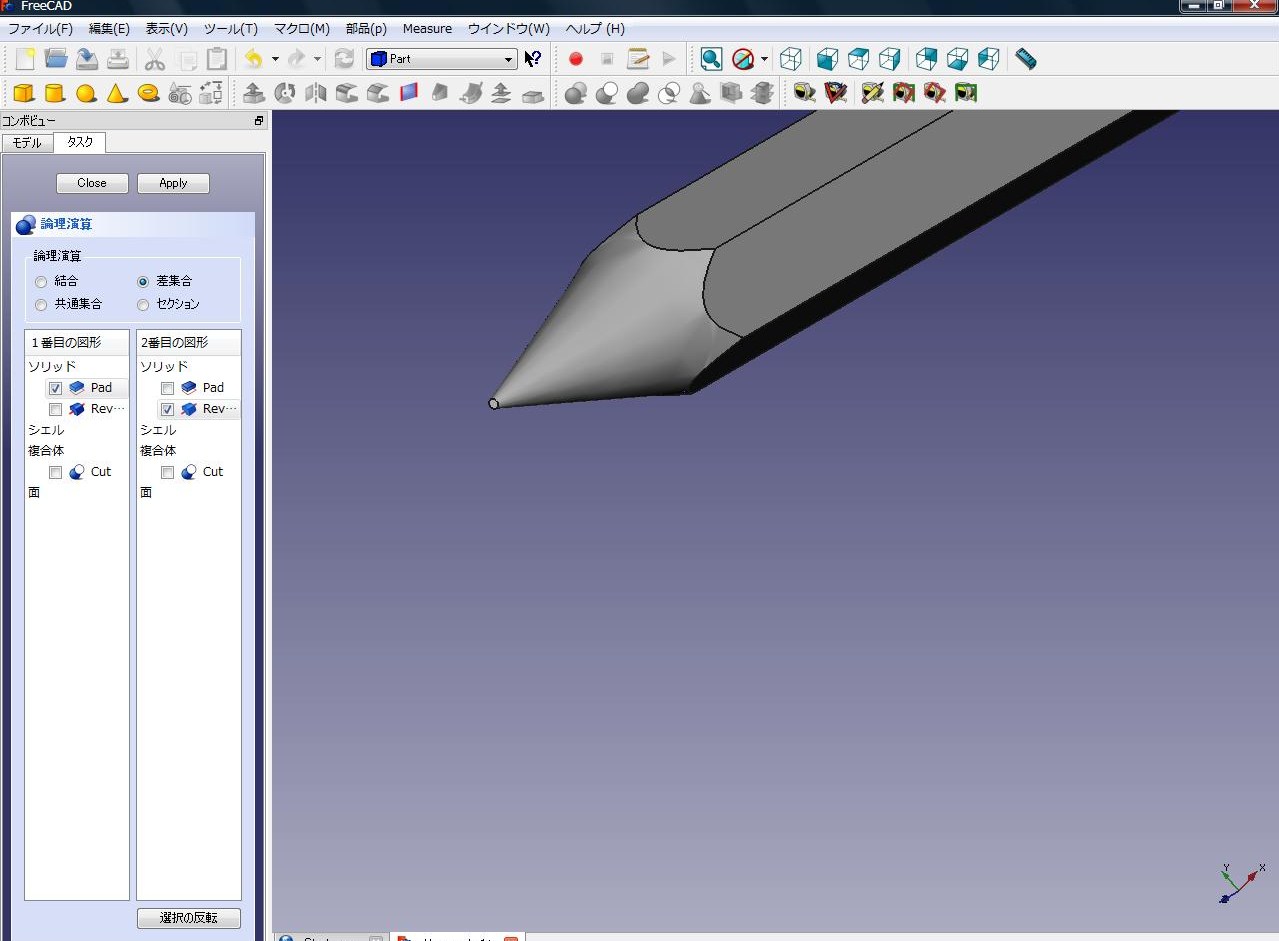
This screen is right.
Finally, attaching a eraser to a pencil.
Choice the back screen of the pencil, and make a sketch.
First, decide the size of the eraser.
Make circle under the pencil using the tool pointed.
the size is free,

After,repeat the center of the circle and the point of intersection of the X-axis and the Y-axis using tool pointed.
After, crick “押し出し(Pad)”, and make the main body of the eraser.
Here, the size is free,
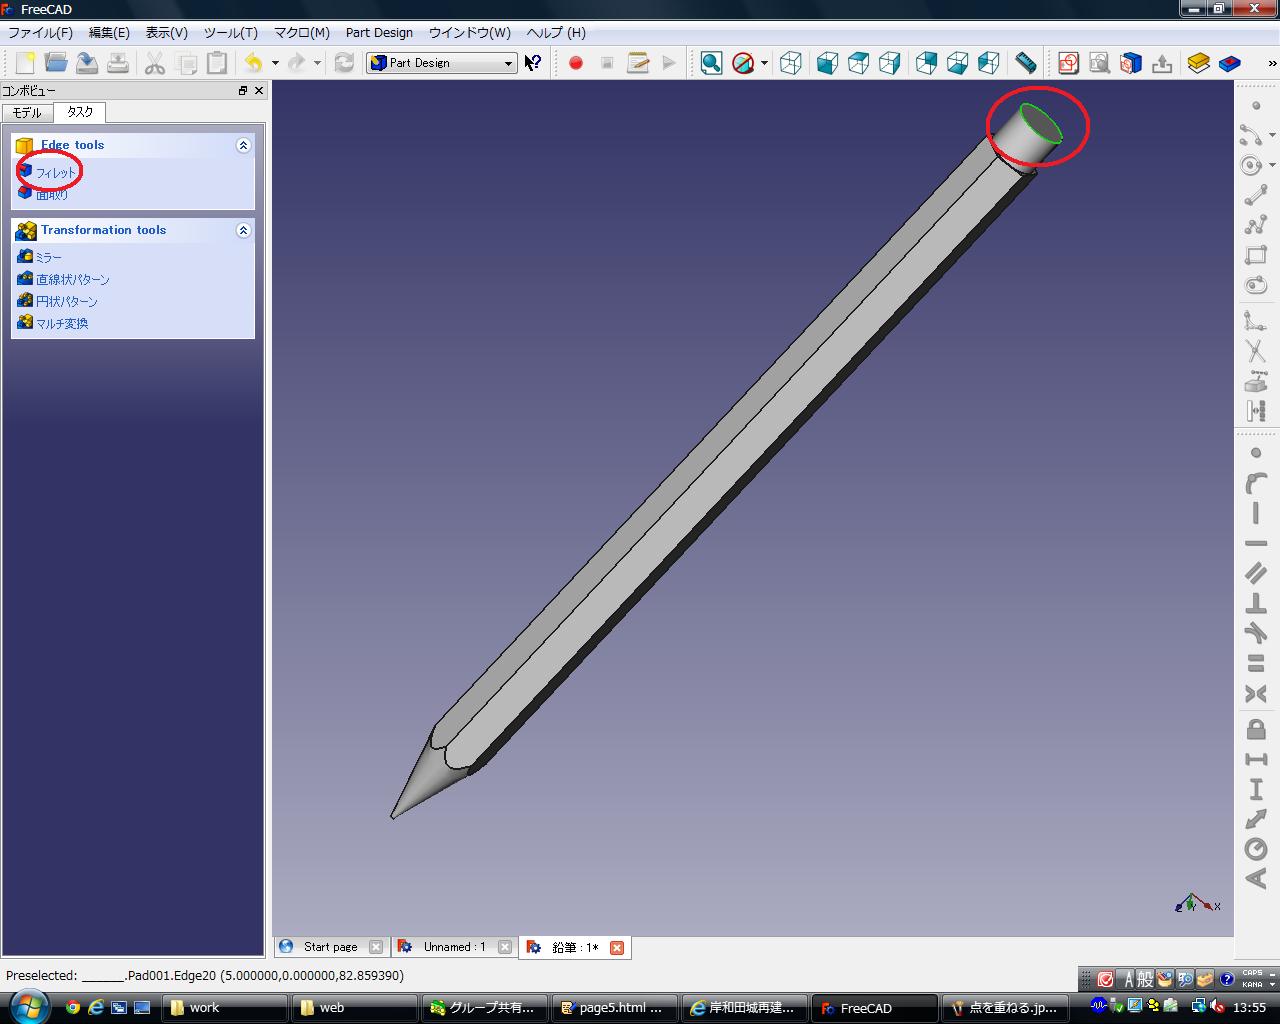
Finally, choice the green of green, andcrick “フィレット(filet)”.
The size is free, too.
Please choice your favorite angle.
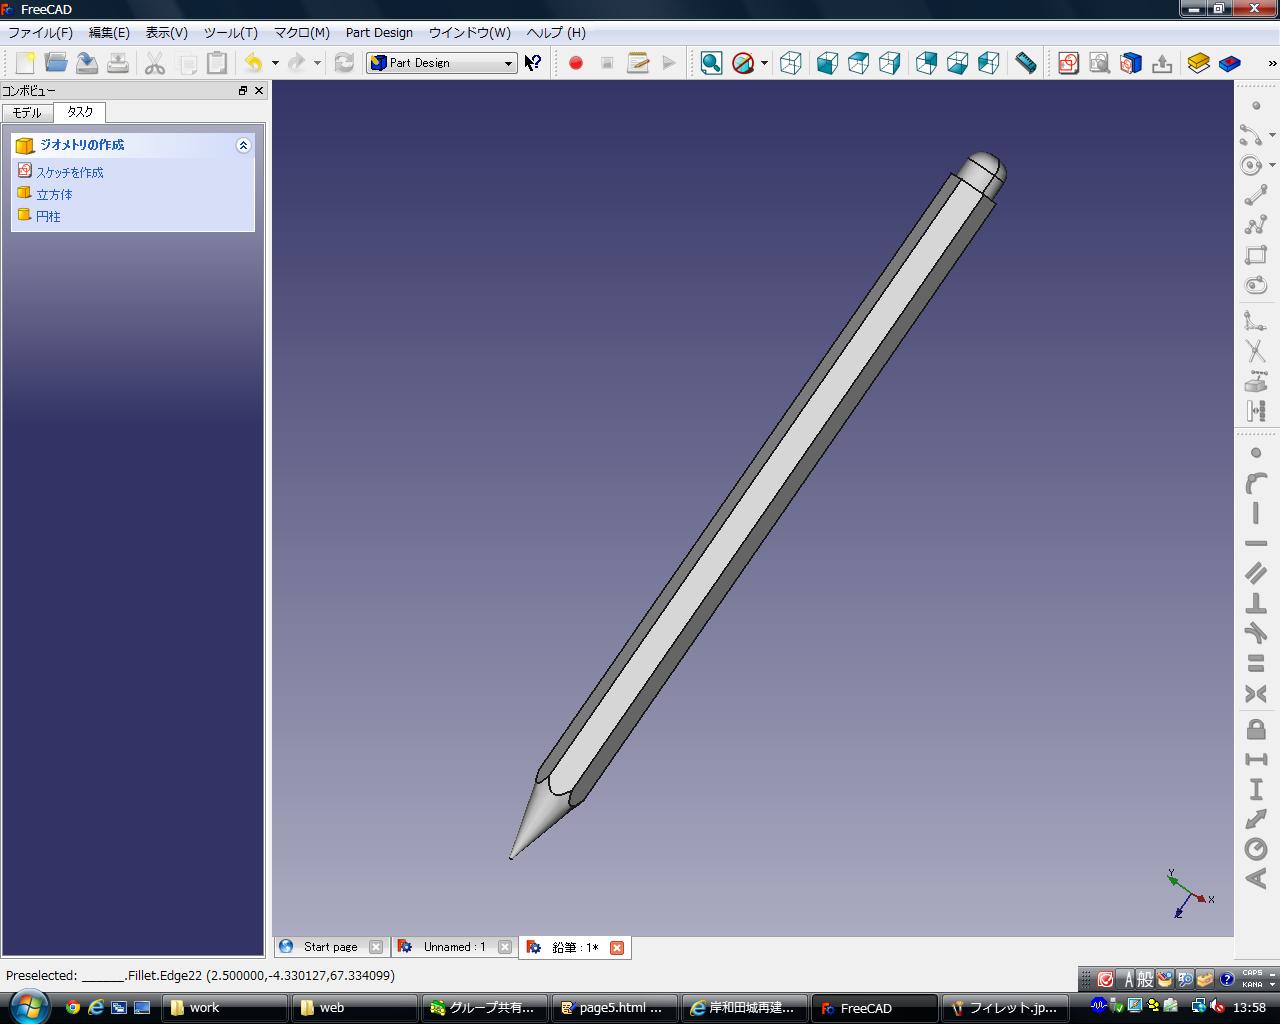
In this, the pencil is completed,
