
Step.4
Let's Print!
Now it's time to print. First, we will convert the CAD data we have designed and print it with a 3D printer.
Step.4: We will show you how to use the slicer softwareSlicer software is one that converts (slices) object data into data for printing and rewrites it in a format that 3D printers understand when printing with a 3D printer. when converting CAD data and the key points of when actually printing the data. This is the moment when your imagination takes shape!
Table of Contents
Let's print it out right away. However, you cannot use the 3D model files produced by CAD. It is necessary to change the data into a format for 3D printers by using a conversion slicer softwareSlicer software is one that converts (slices) object data into data for printing and rewrites it in a format that 3D printers understand when printing with a 3D printer..
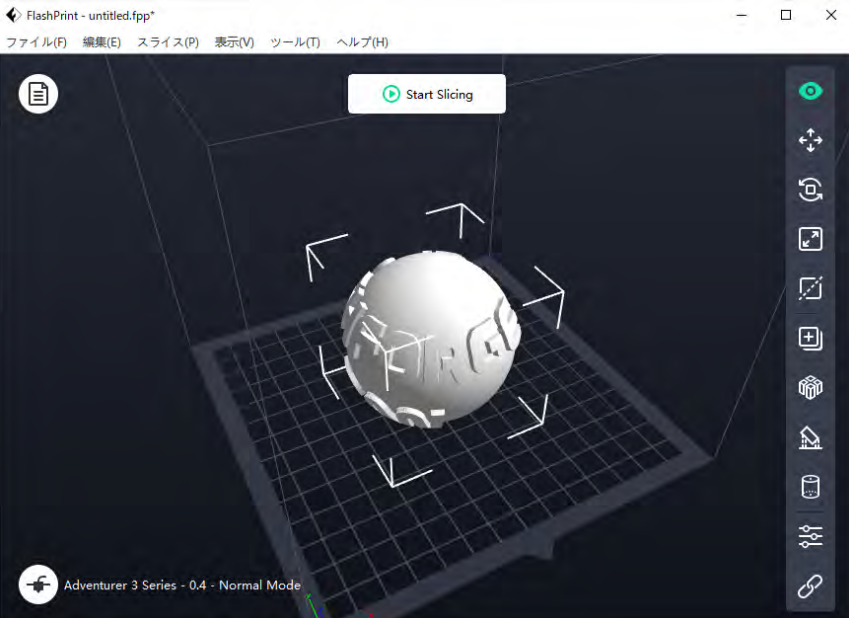
Here, we will explain how to use the slicer softwareSlicer software is one that converts (slices) object data into data for printing and rewrites it in a format that 3D printers understand when printing with a 3D printer. for Fused Filament Fabrication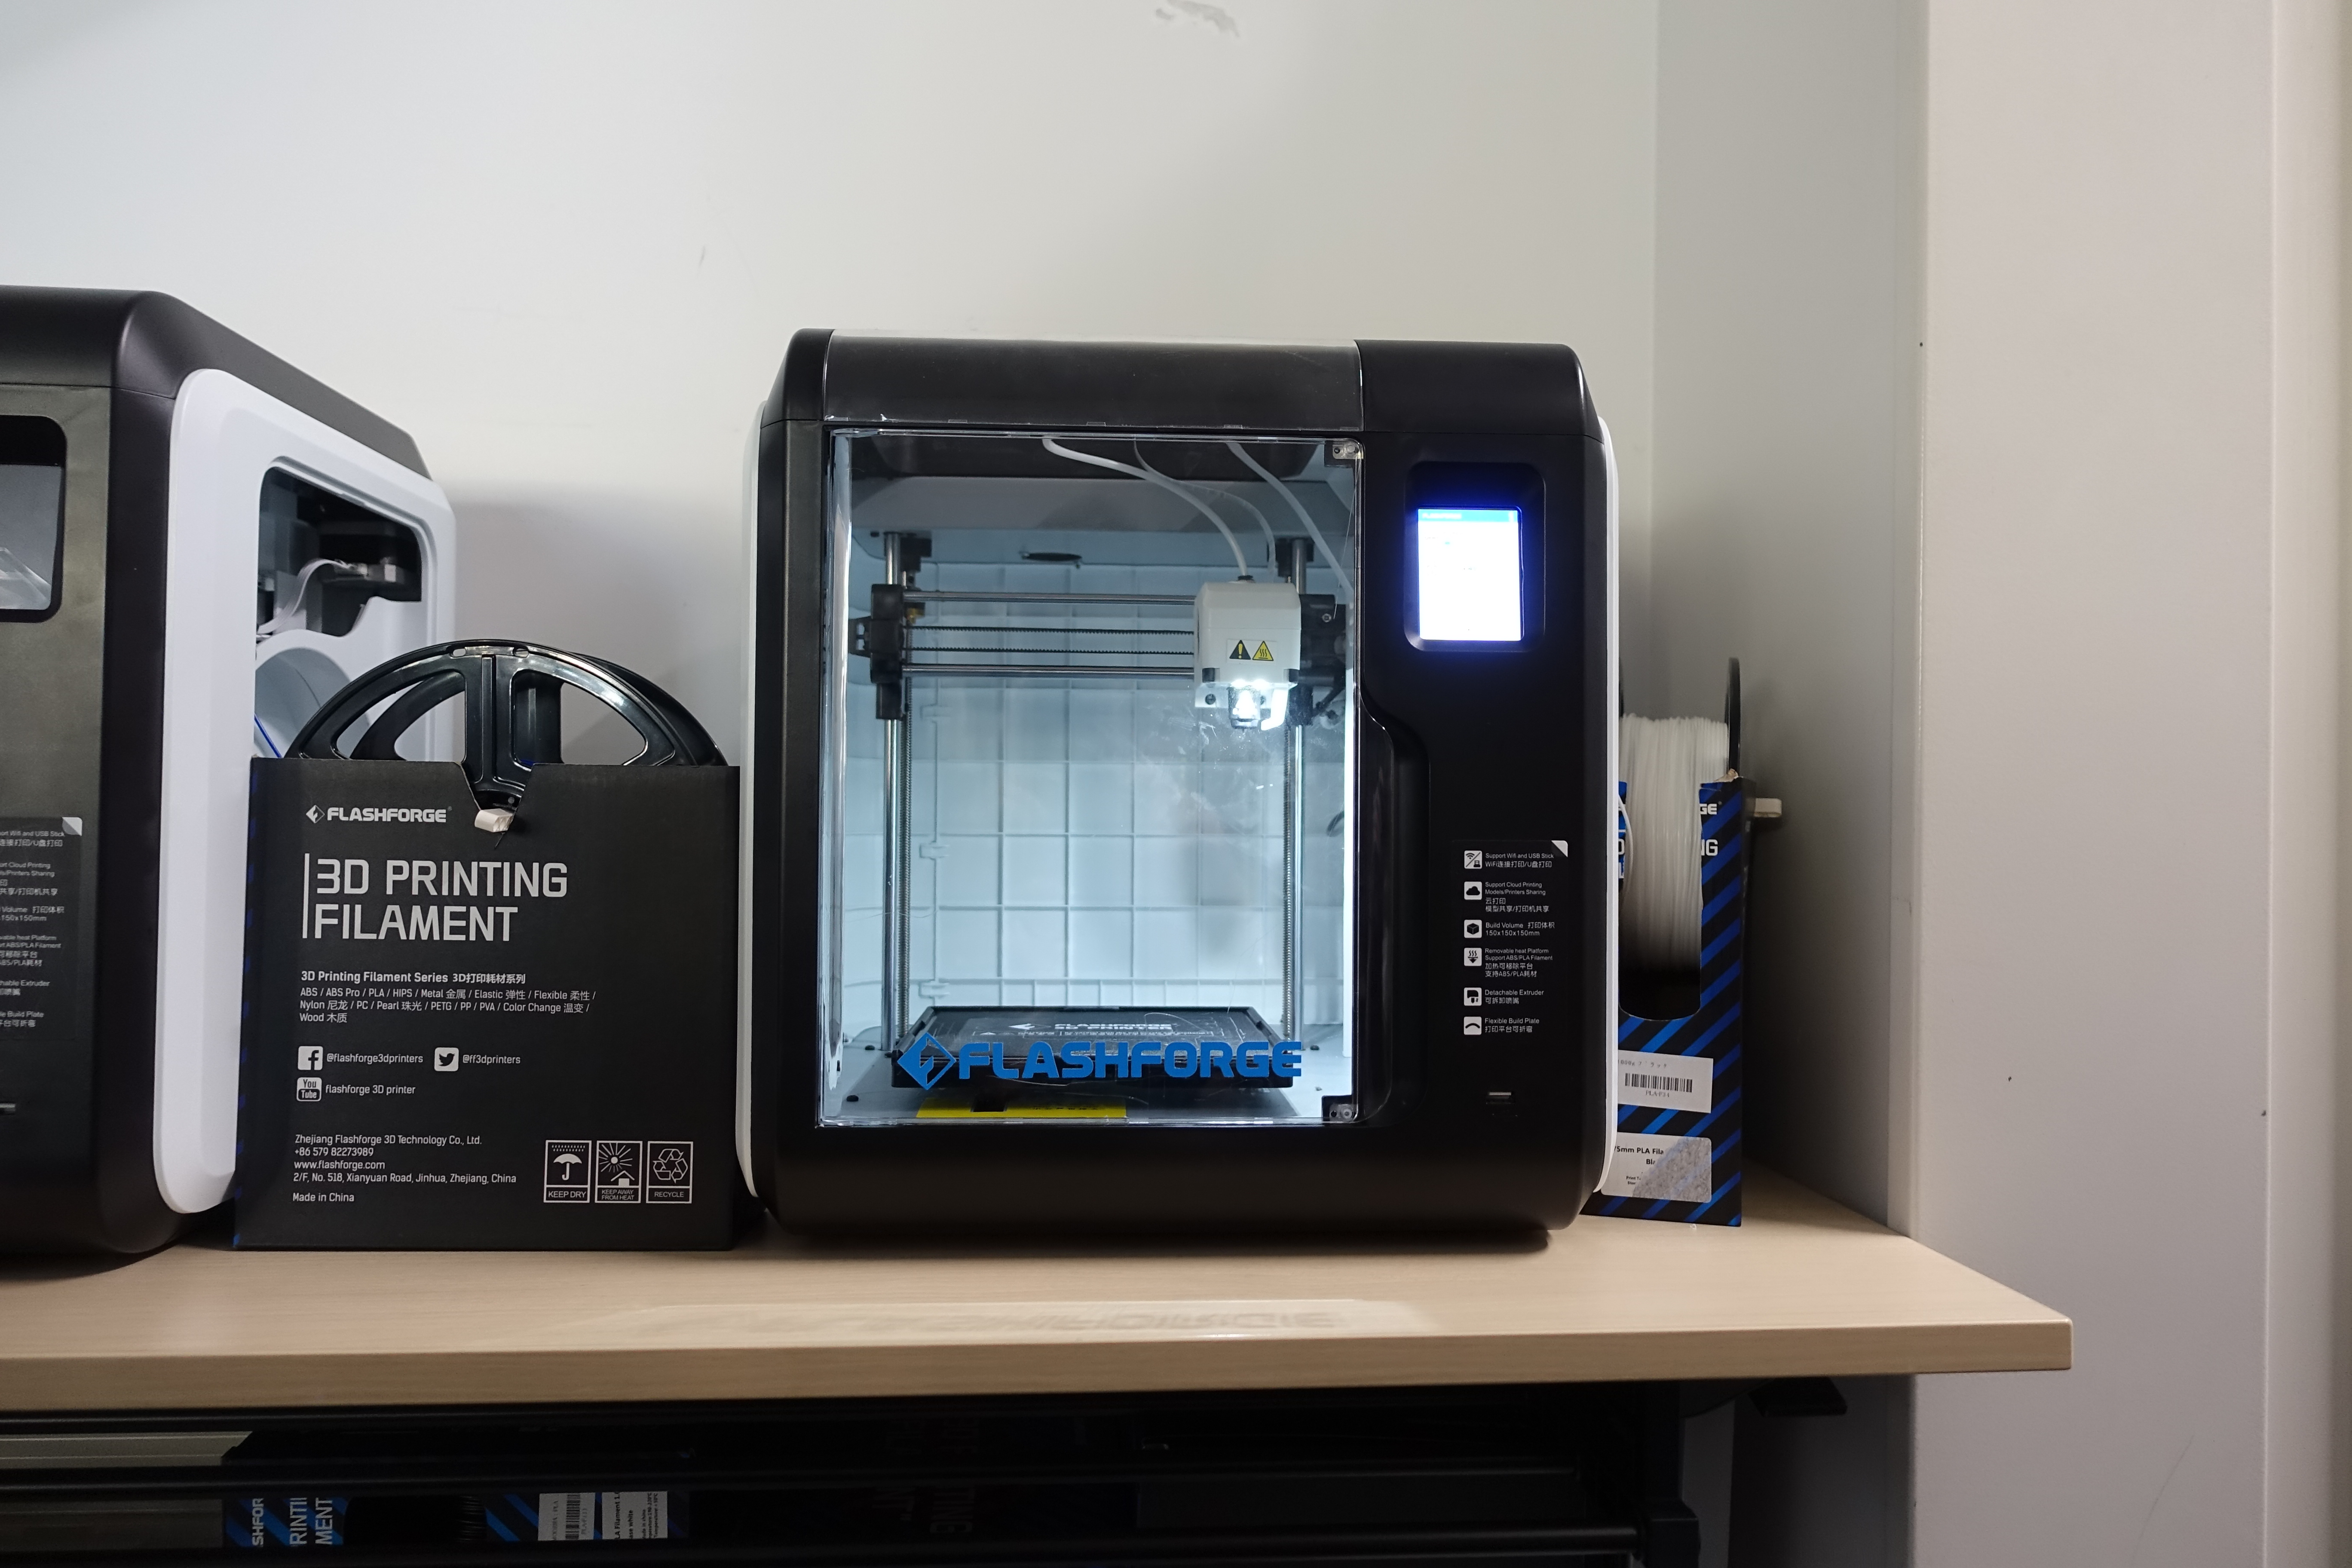 Fused Filament Fabrication is a method that draws each layer and stacks them by extruding resin from the heated nozzle and changing the relative position between the stage and nozzle. named "FlashPrint" developed by FLASHFORGE.
First, you open the 3D object file, whose extension is stl, obj, or 3mf, etc, with Slicer software. Then, you can produce objects efficiently by rotating objects or changing directions on the software Slicer.
Source:after-support.flashforge.jp
▲Slicer SoftwareSlicer software is one that converts (slices) object data into data for printing and rewrites it in a format that 3D printers understand when printing with a 3D printer.
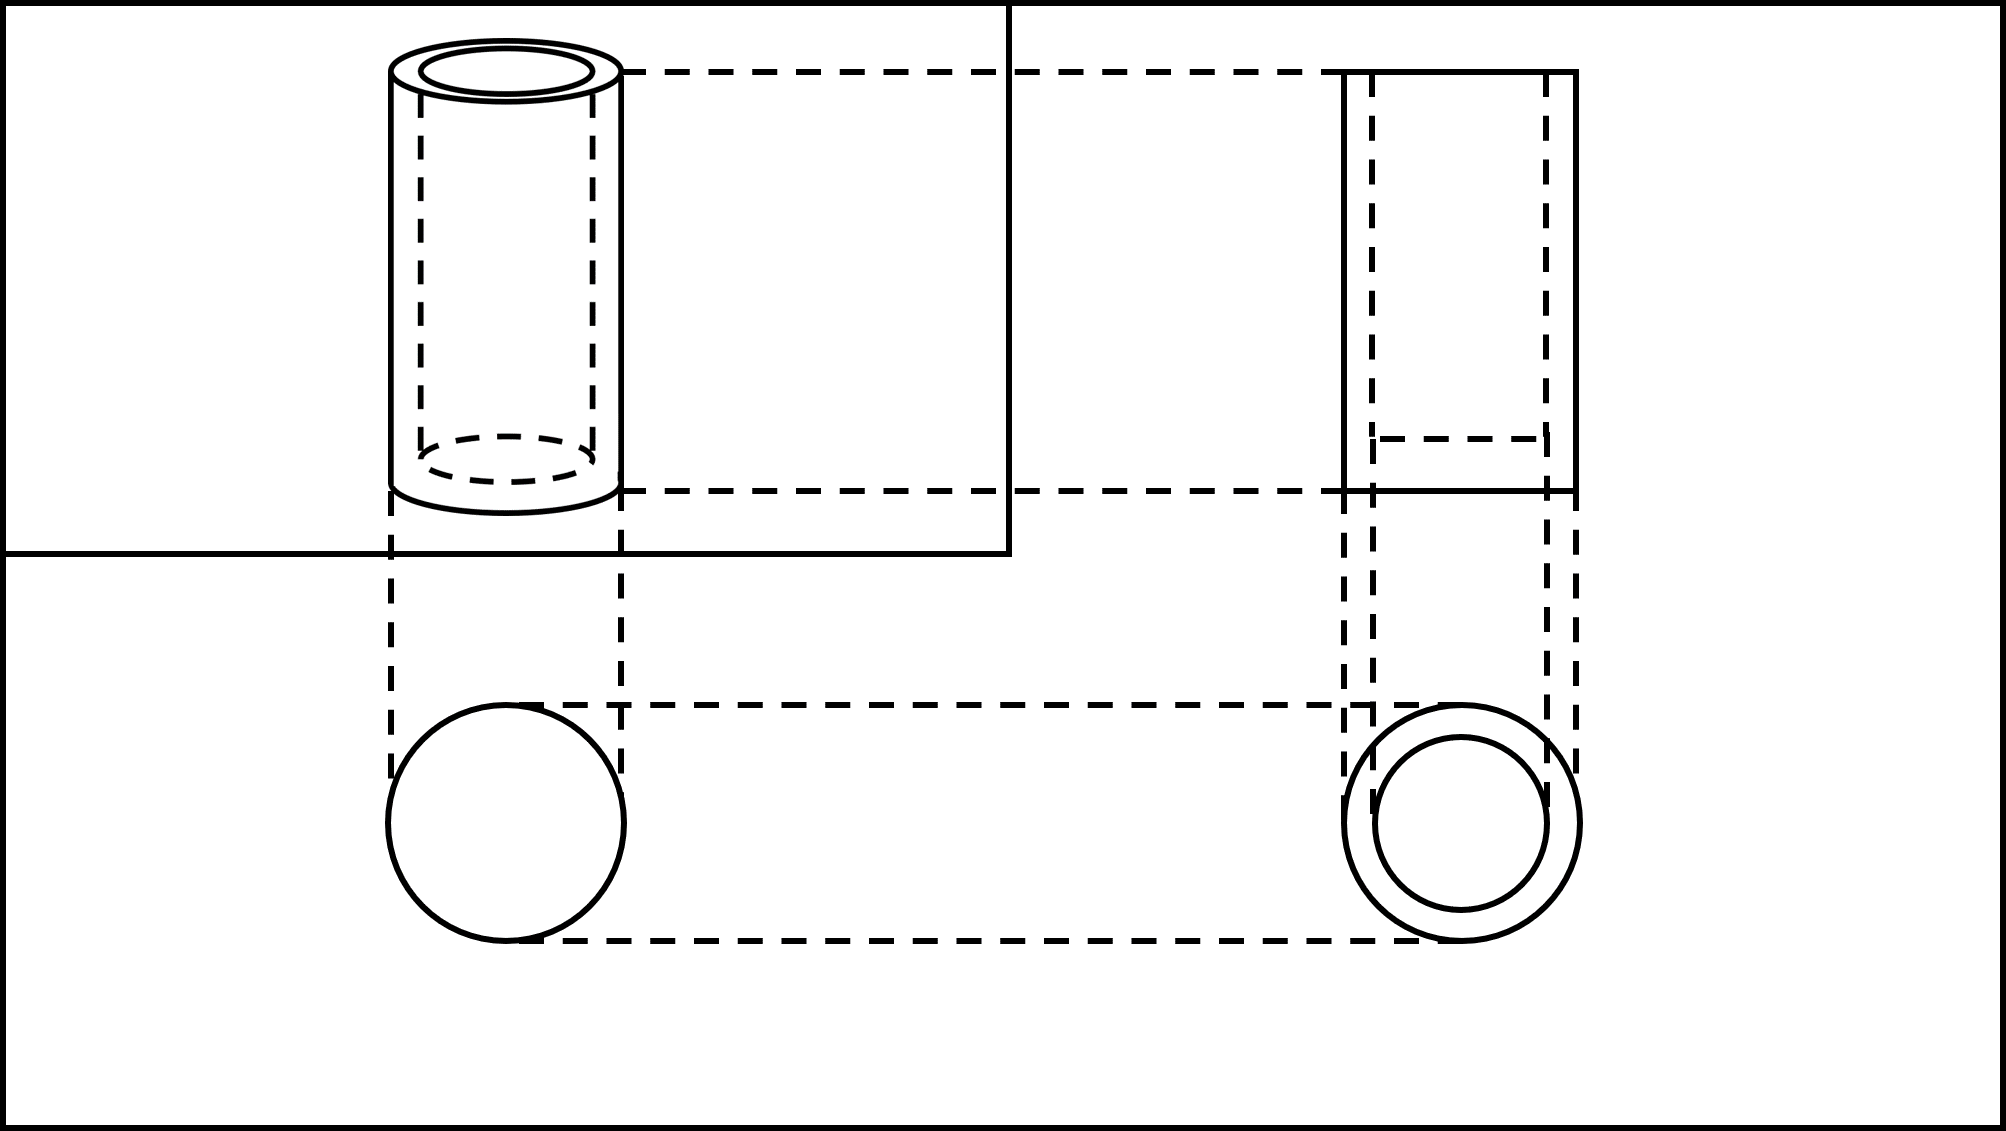
After completing the position and rotation settings, set support structures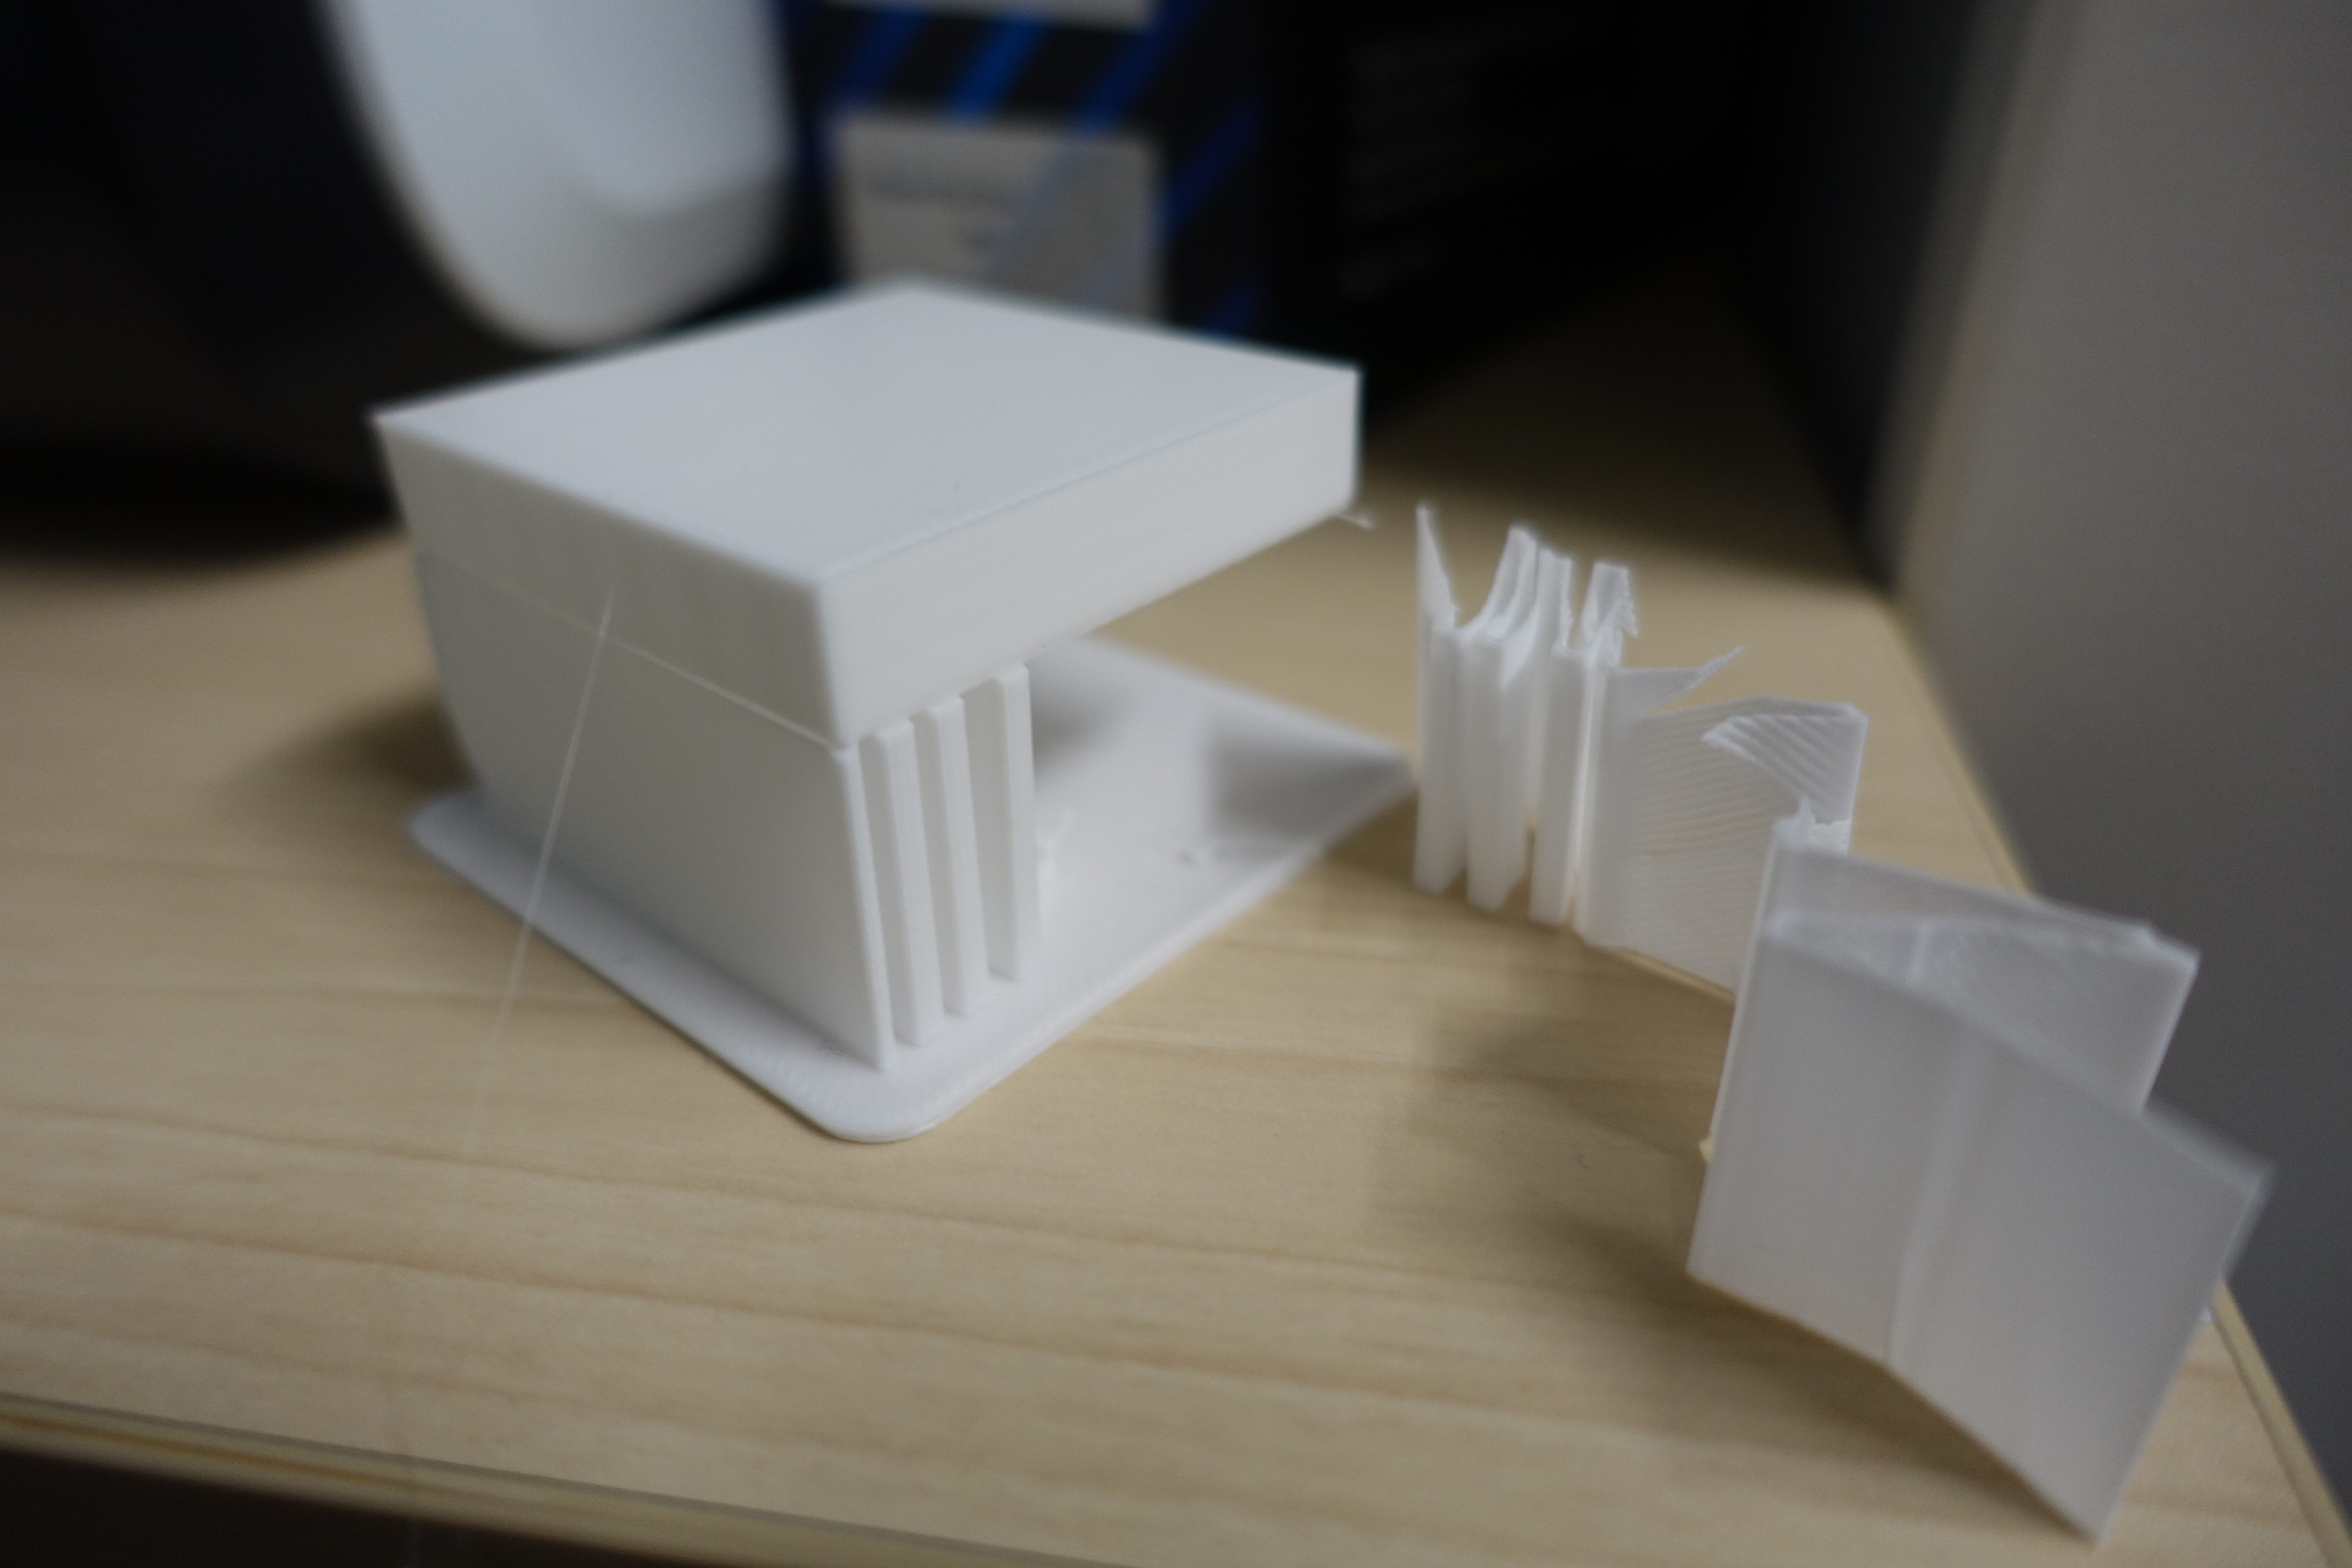 Support structures is a pillar printed between the hollow part (overhang) and the stage to prevent extruded filaments from floating during modeling.. The support structureSupport structures is a pillar printed between the hollow part (overhang) and the stage to prevent extruded filaments from floating during modeling. is a pillar printed between the stage
 A stage is the foundation on which moldings are printed in a 3D printer. and the floating point to prevent the filament
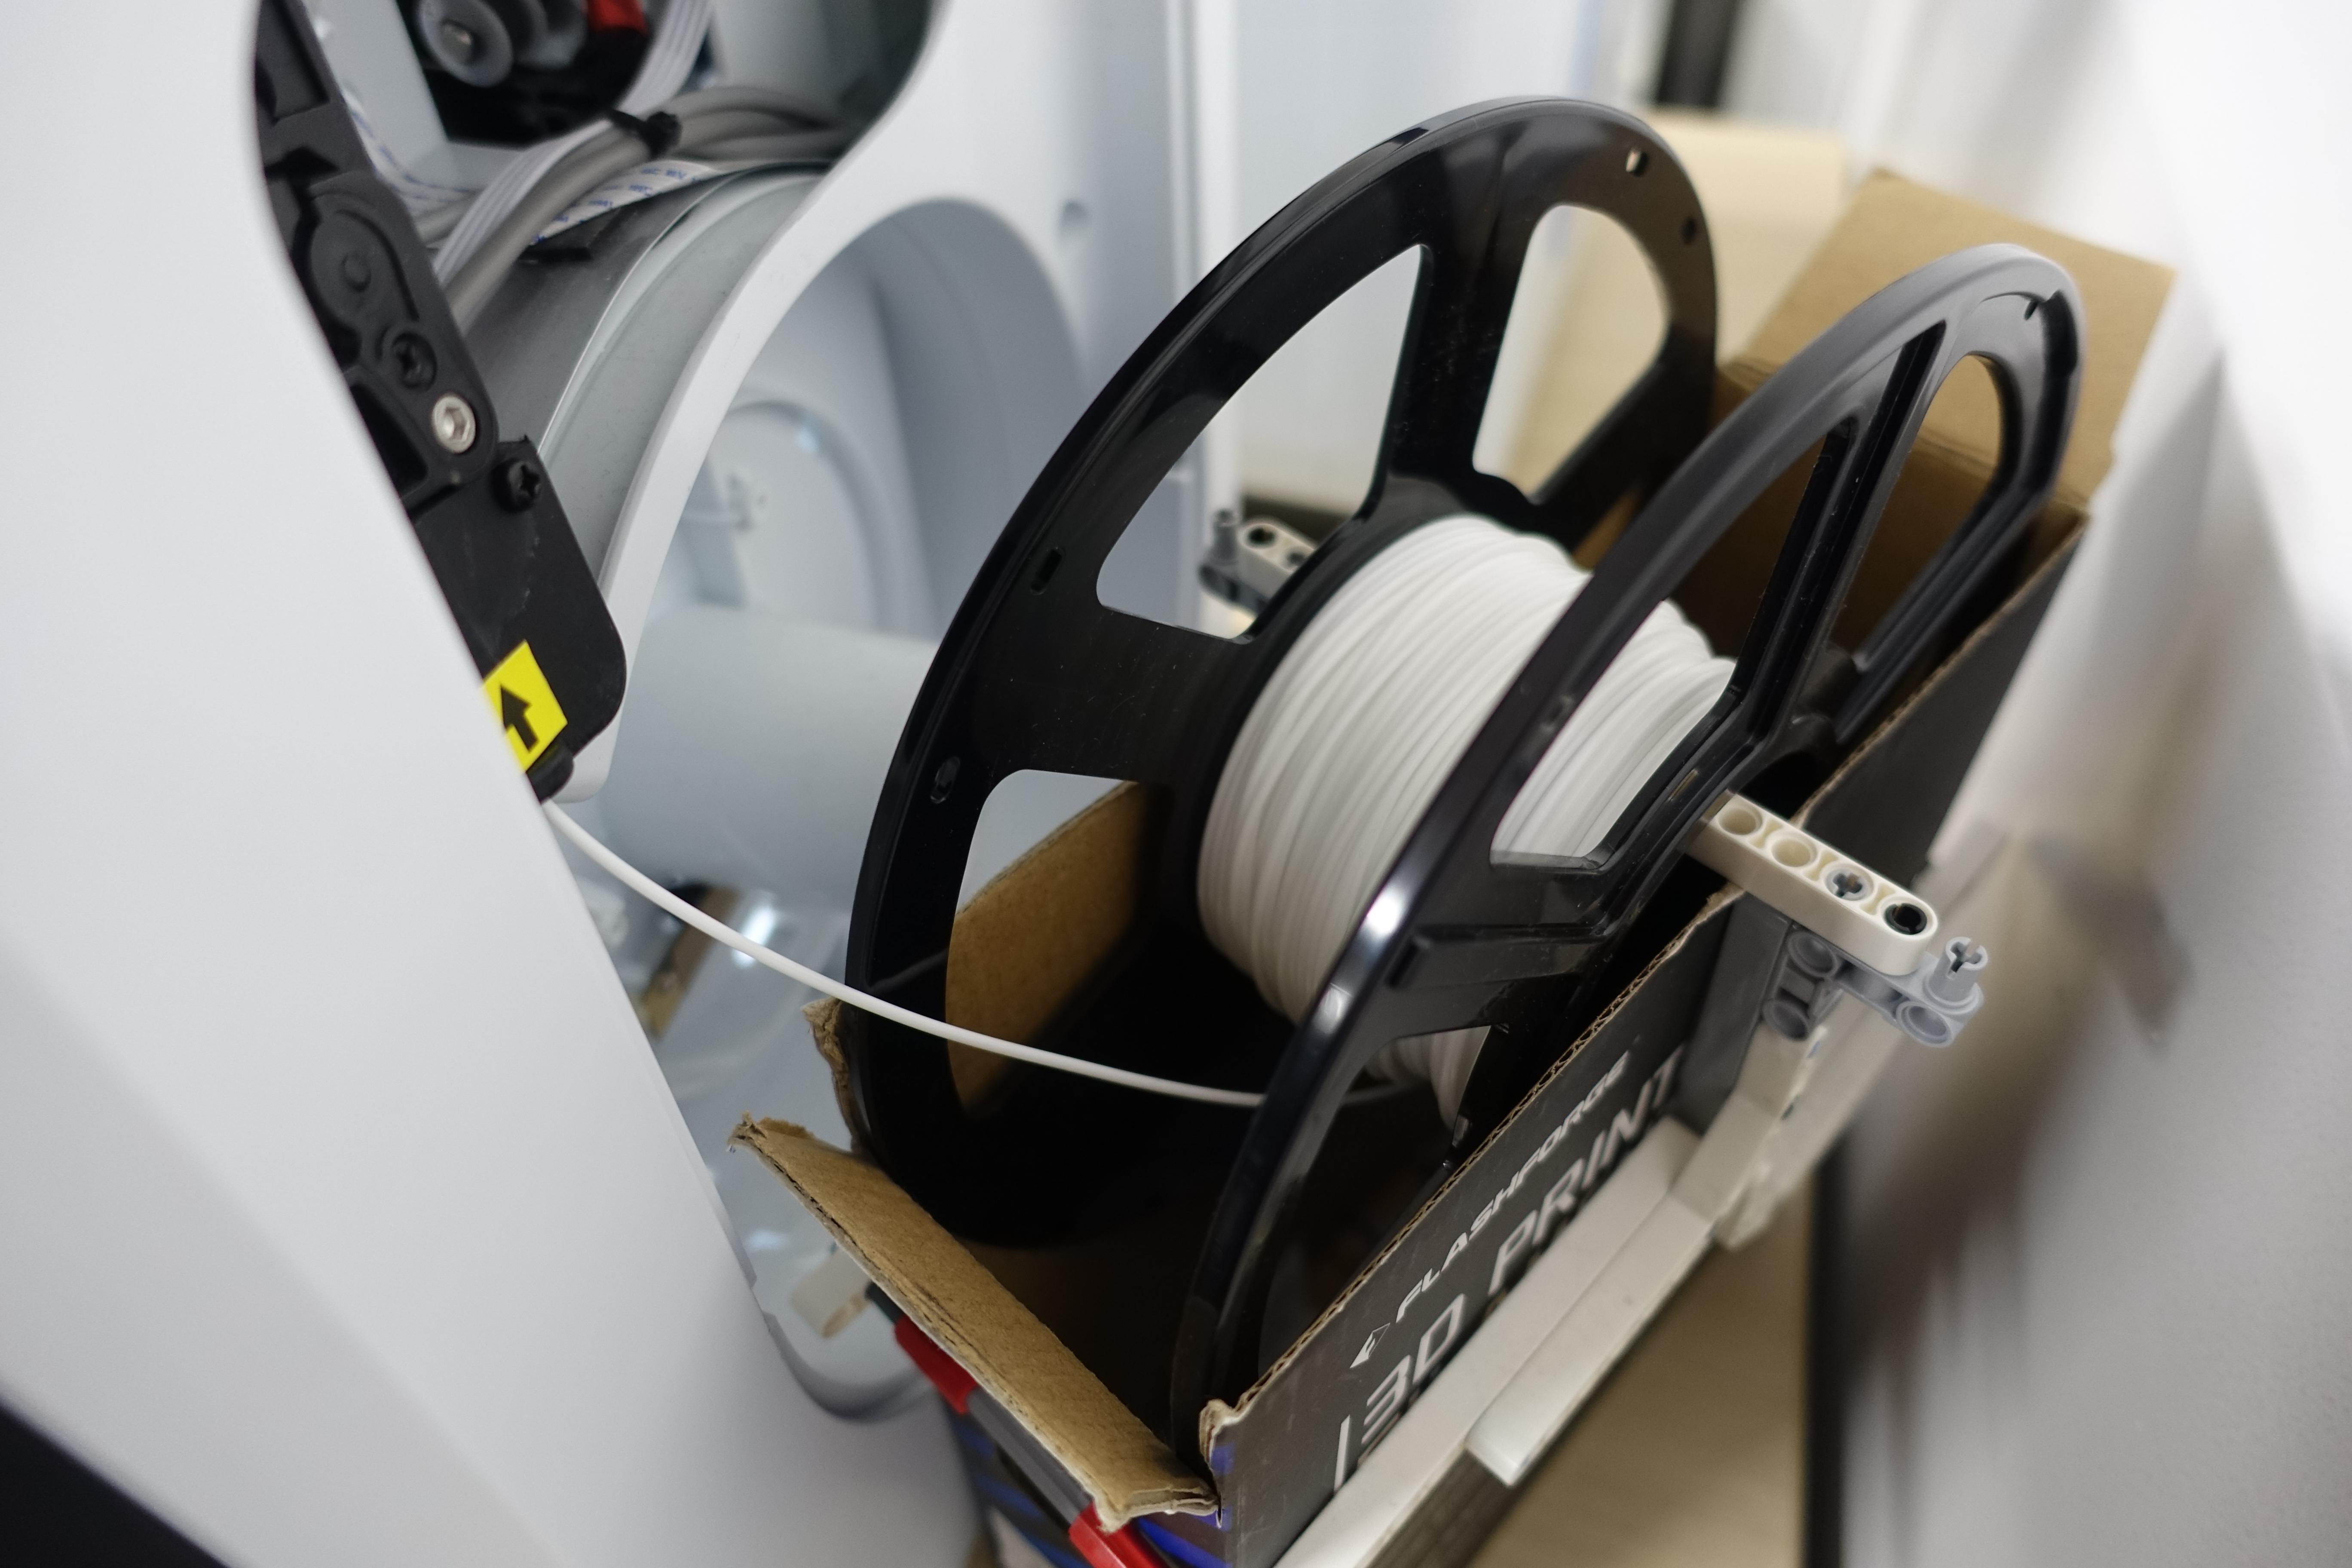 Filament is a tubular resin used in the Fused Filament Fabrication, which can be wound onto a reel and is easy to handle. from floating (overhang
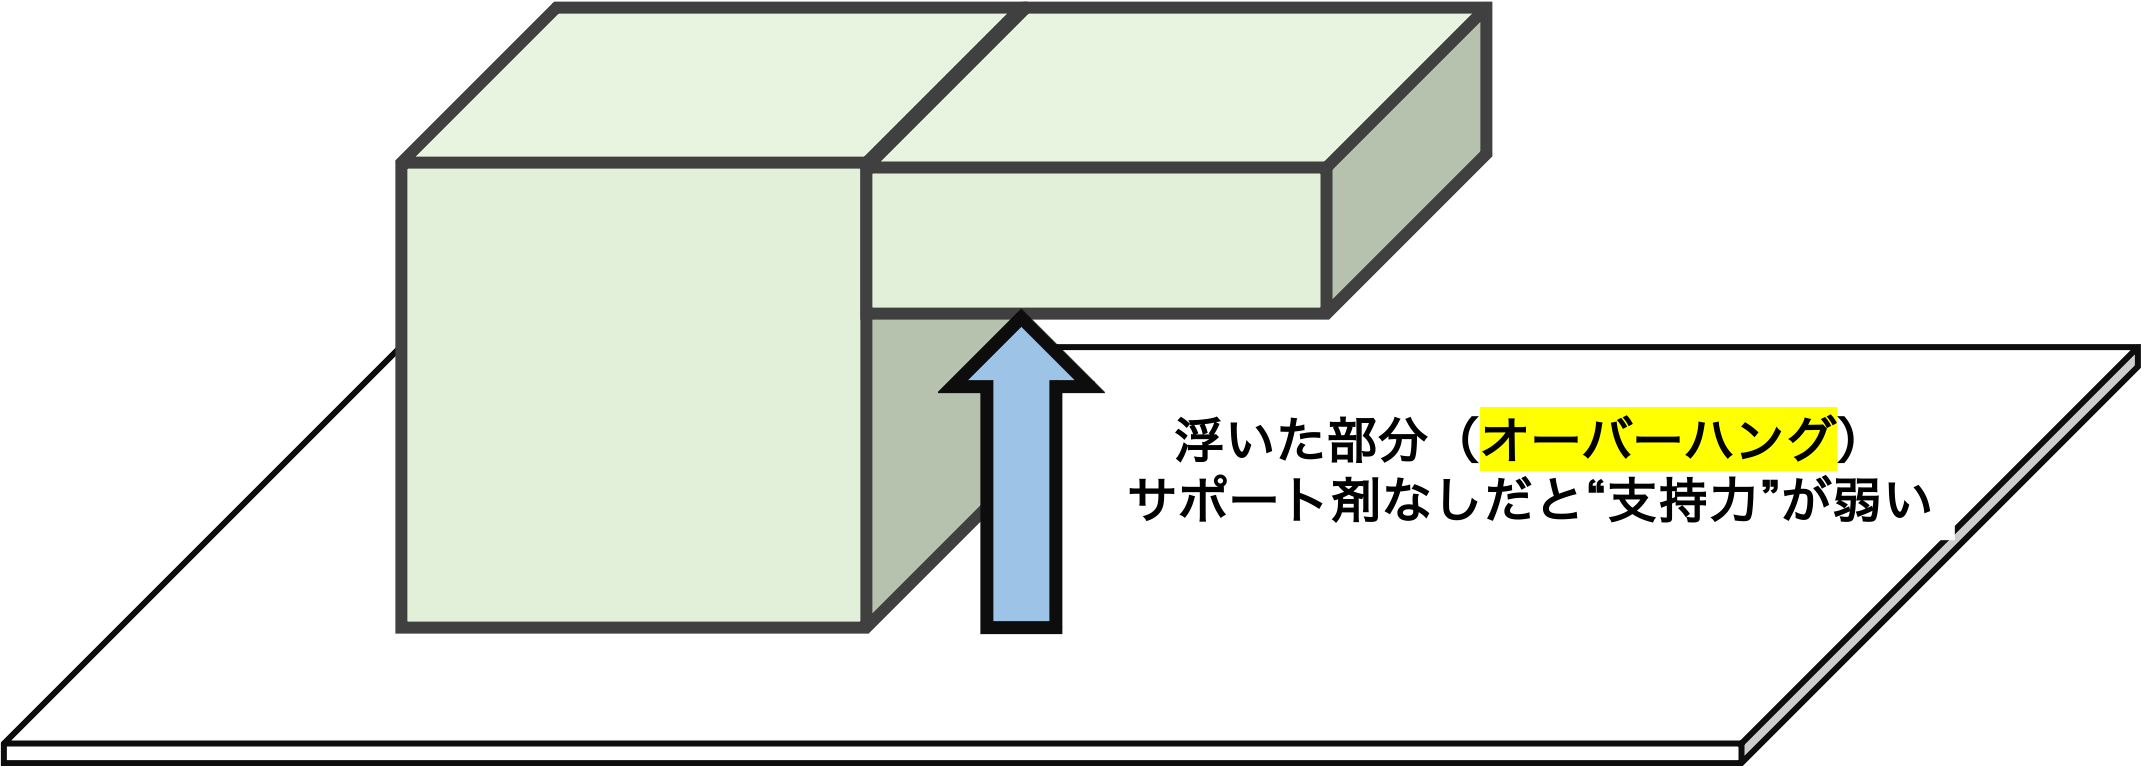 An overhangs is an area in a modeling object that is floating in the air without support. Support structures is required when printing moldings.) during printing and to support the printed object. We can easily remove it after the process. The support structureSupport structures is a pillar printed between the hollow part (overhang) and the stage to prevent extruded filaments from floating during modeling. may not be necessary depending on the shape of the 3D models.
Place: Dengiken's club room
▲Support StructuresSupport structures is a pillar printed between the hollow part (overhang) and the stage to prevent extruded filaments from floating during modeling.
Some slicer softwareSlicer software is one that converts (slices) object data into data for printing and rewrites it in a format that 3D printers understand when printing with a 3D printer. has a function to automatically determine where a support structureSupport structures is a pillar printed between the hollow part (overhang) and the stage to prevent extruded filaments from floating during modeling. is necessary and create an appropriate support structureSupport structures is a pillar printed between the hollow part (overhang) and the stage to prevent extruded filaments from floating during modeling..

Source:after-support.flashforge.jp
▲Picture of an automatically created support structureSupport structures is a pillar printed between the hollow part (overhang) and the stage to prevent extruded filaments from floating during modeling.
After setting up the support structureSupport structures is a pillar printed between the hollow part (overhang) and the stage to prevent extruded filaments from floating during modeling., change the print settings. The table shows the three points for the settings.
| Layer resolution is the thickness of each layer of the 3D model. The smaller the thickness is, the more accurate the printing will be. | |
| The printing speed. Faster is better, but it may result in less accurate printing. | |
| Infill density is the percentage of resin inside the model. The larger the value is, the stronger the model will be, but more resin will be used. | |
| The filling pattern refers to the printed shape inside the model, which can be hexagonal or triangular. Strength and printing speed vary depending on the pattern. |
Although the settings available vary depending on the slicer softwareSlicer software is one that converts (slices) object data into data for printing and rewrites it in a format that 3D printers understand when printing with a 3D printer. and printer, keep the above four items in mind since they are related to speed and accuracy.
After you finish the print settings, move on to the data export, which involves converting the data into a form that the 3D printer can read.
This data allows the 3D printer to determine when and how the nozzles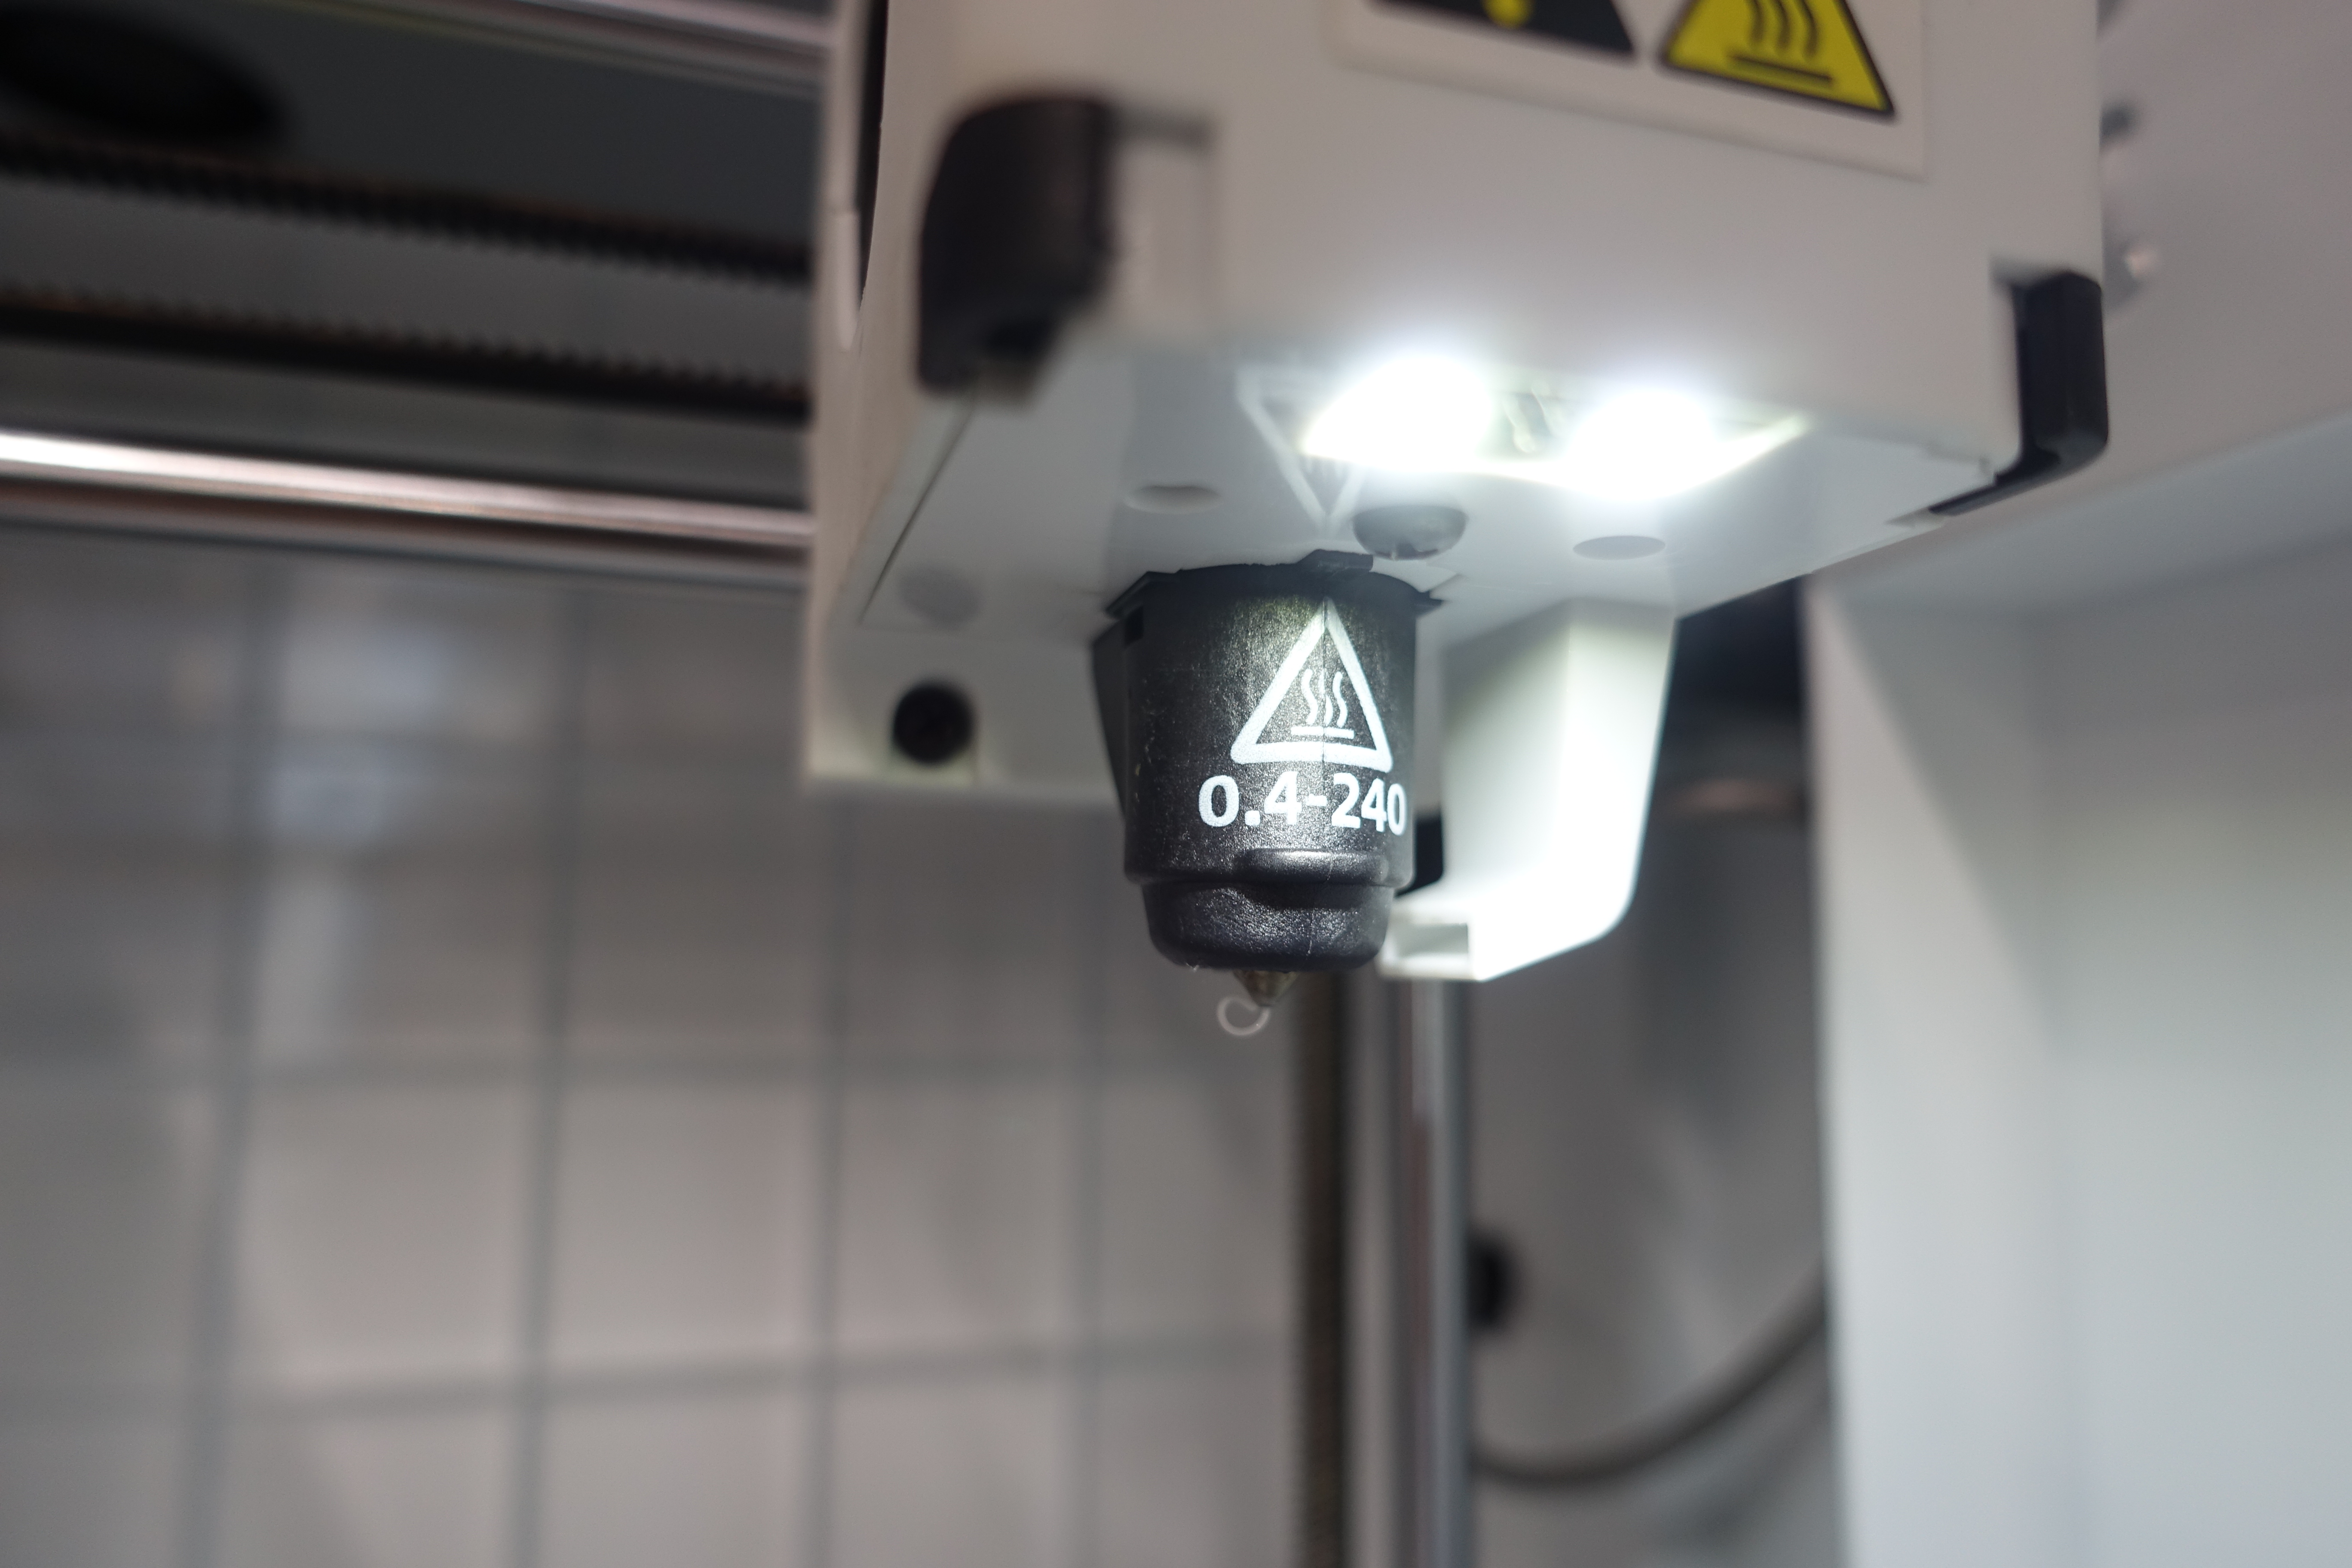 A nozzle is a component that extrudes filament (resin) and prints it on the stage. should move for each surface (slice) to print the 3D model.
After you convert the data, it is time to print!
We will show how to use a type of 3D printer, Fused Filament FabricationFused Filament Fabrication is a method that draws each layer and stacks them by extruding resin from the heated nozzle and changing the relative position between the stage and nozzle. , which is commonly used at home.
In this section, we'll introduce our 3D printer, Fused Filament FabricationFused Filament Fabrication is a method that draws each layer and stacks them by extruding resin from the heated nozzle and changing the relative position between the stage and nozzle. , made by FLASHFORGE, with the pictures of "Adventurer3."
First, Set up the 3D printer. Then, turn on the power and set the filamentFilament is a tubular resin used in the Fused Filament Fabrication, which can be wound onto a reel and is easy to handle. (resin). Also, adjust the position of the nozzleA nozzle is a component that extrudes filament (resin) and prints it on the stage. and the stageA stage is the foundation on which moldings are printed in a 3D printer. so that the resin is properly pushed out onto the stageA stage is the foundation on which moldings are printed in a 3D printer..
Some models are equipped with a function called auto-calibration, which automatically adjusts the position between the nozzleA nozzle is a component that extrudes filament (resin) and prints it on the stage. and the stageA stage is the foundation on which moldings are printed in a 3D printer.. We don't have to adjust it manually.
Place: Dengiken's club room
▲FilamentFilament is a tubular resin used in the Fused Filament Fabrication, which can be wound onto a reel and is easy to handle.
Please refer to the following page for information on filamentFilament is a tubular resin used in the Fused Filament Fabrication, which can be wound onto a reel and is easy to handle. types.
After setting up the printer, it is time to send the data. Send the data converted by the slicer softwareSlicer software is one that converts (slices) object data into data for printing and rewrites it in a format that 3D printers understand when printing with a 3D printer. to the 3D printer via USB or cloudThe cloud is a feature that allows users to store and make their data available not on their own computers, but on a server somewhere in the world via the Internet. computing.
After sending the data, start printing. During printing, the nozzleA nozzle is a component that extrudes filament (resin) and prints it on the stage. part becomes very hot and extremely dangerous, so be very careful when handling it. Also, be prepared to stop the 3D printer immediately in case of printing errors, running out of filamentFilament is a tubular resin used in the Fused Filament Fabrication, which can be wound onto a reel and is easy to handle., or other emergencies.
Place: Dengiken's club room
▲Printing
Some models offer an online service that allows you to check the printing status, so we recommend using this service.
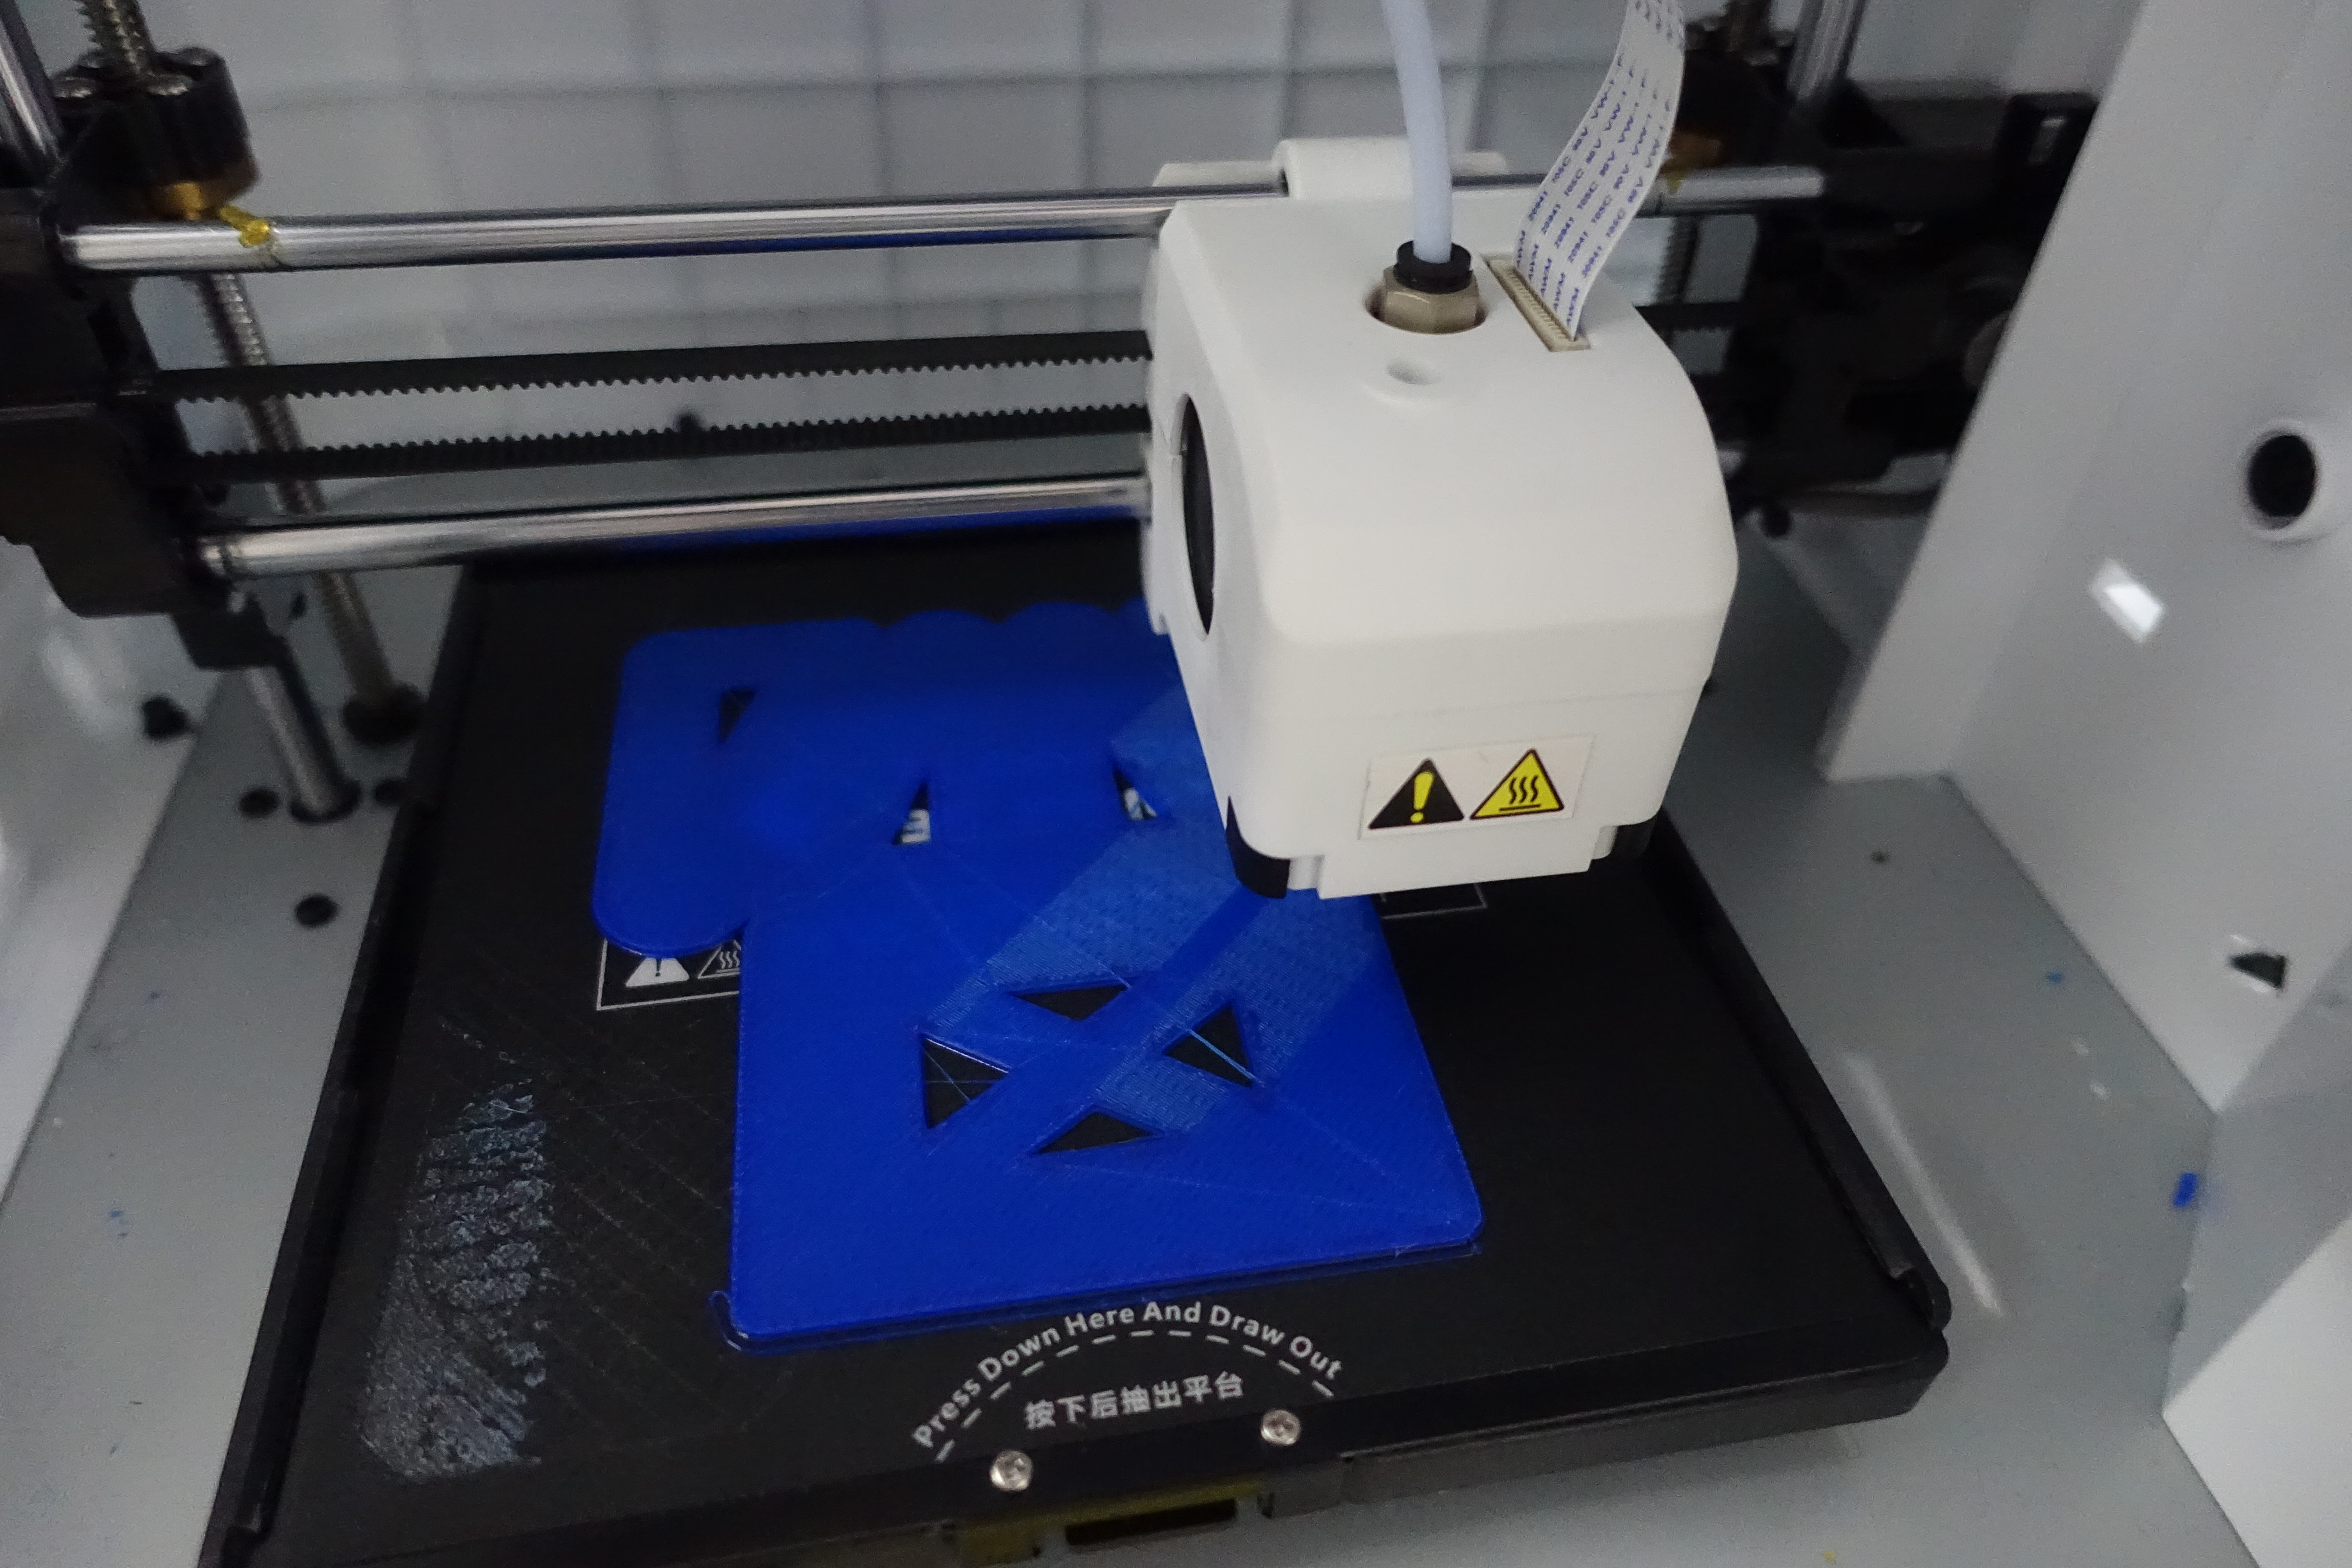
After printing is complete, take out a printed object. Use a fingernail or spatula to peel off the printed object from the stageA stage is the foundation on which moldings are printed in a 3D printer.. Depending on the model, the printed object can be easily removed by detaching the entire stageA stage is the foundation on which moldings are printed in a 3D printer. from the main unit.
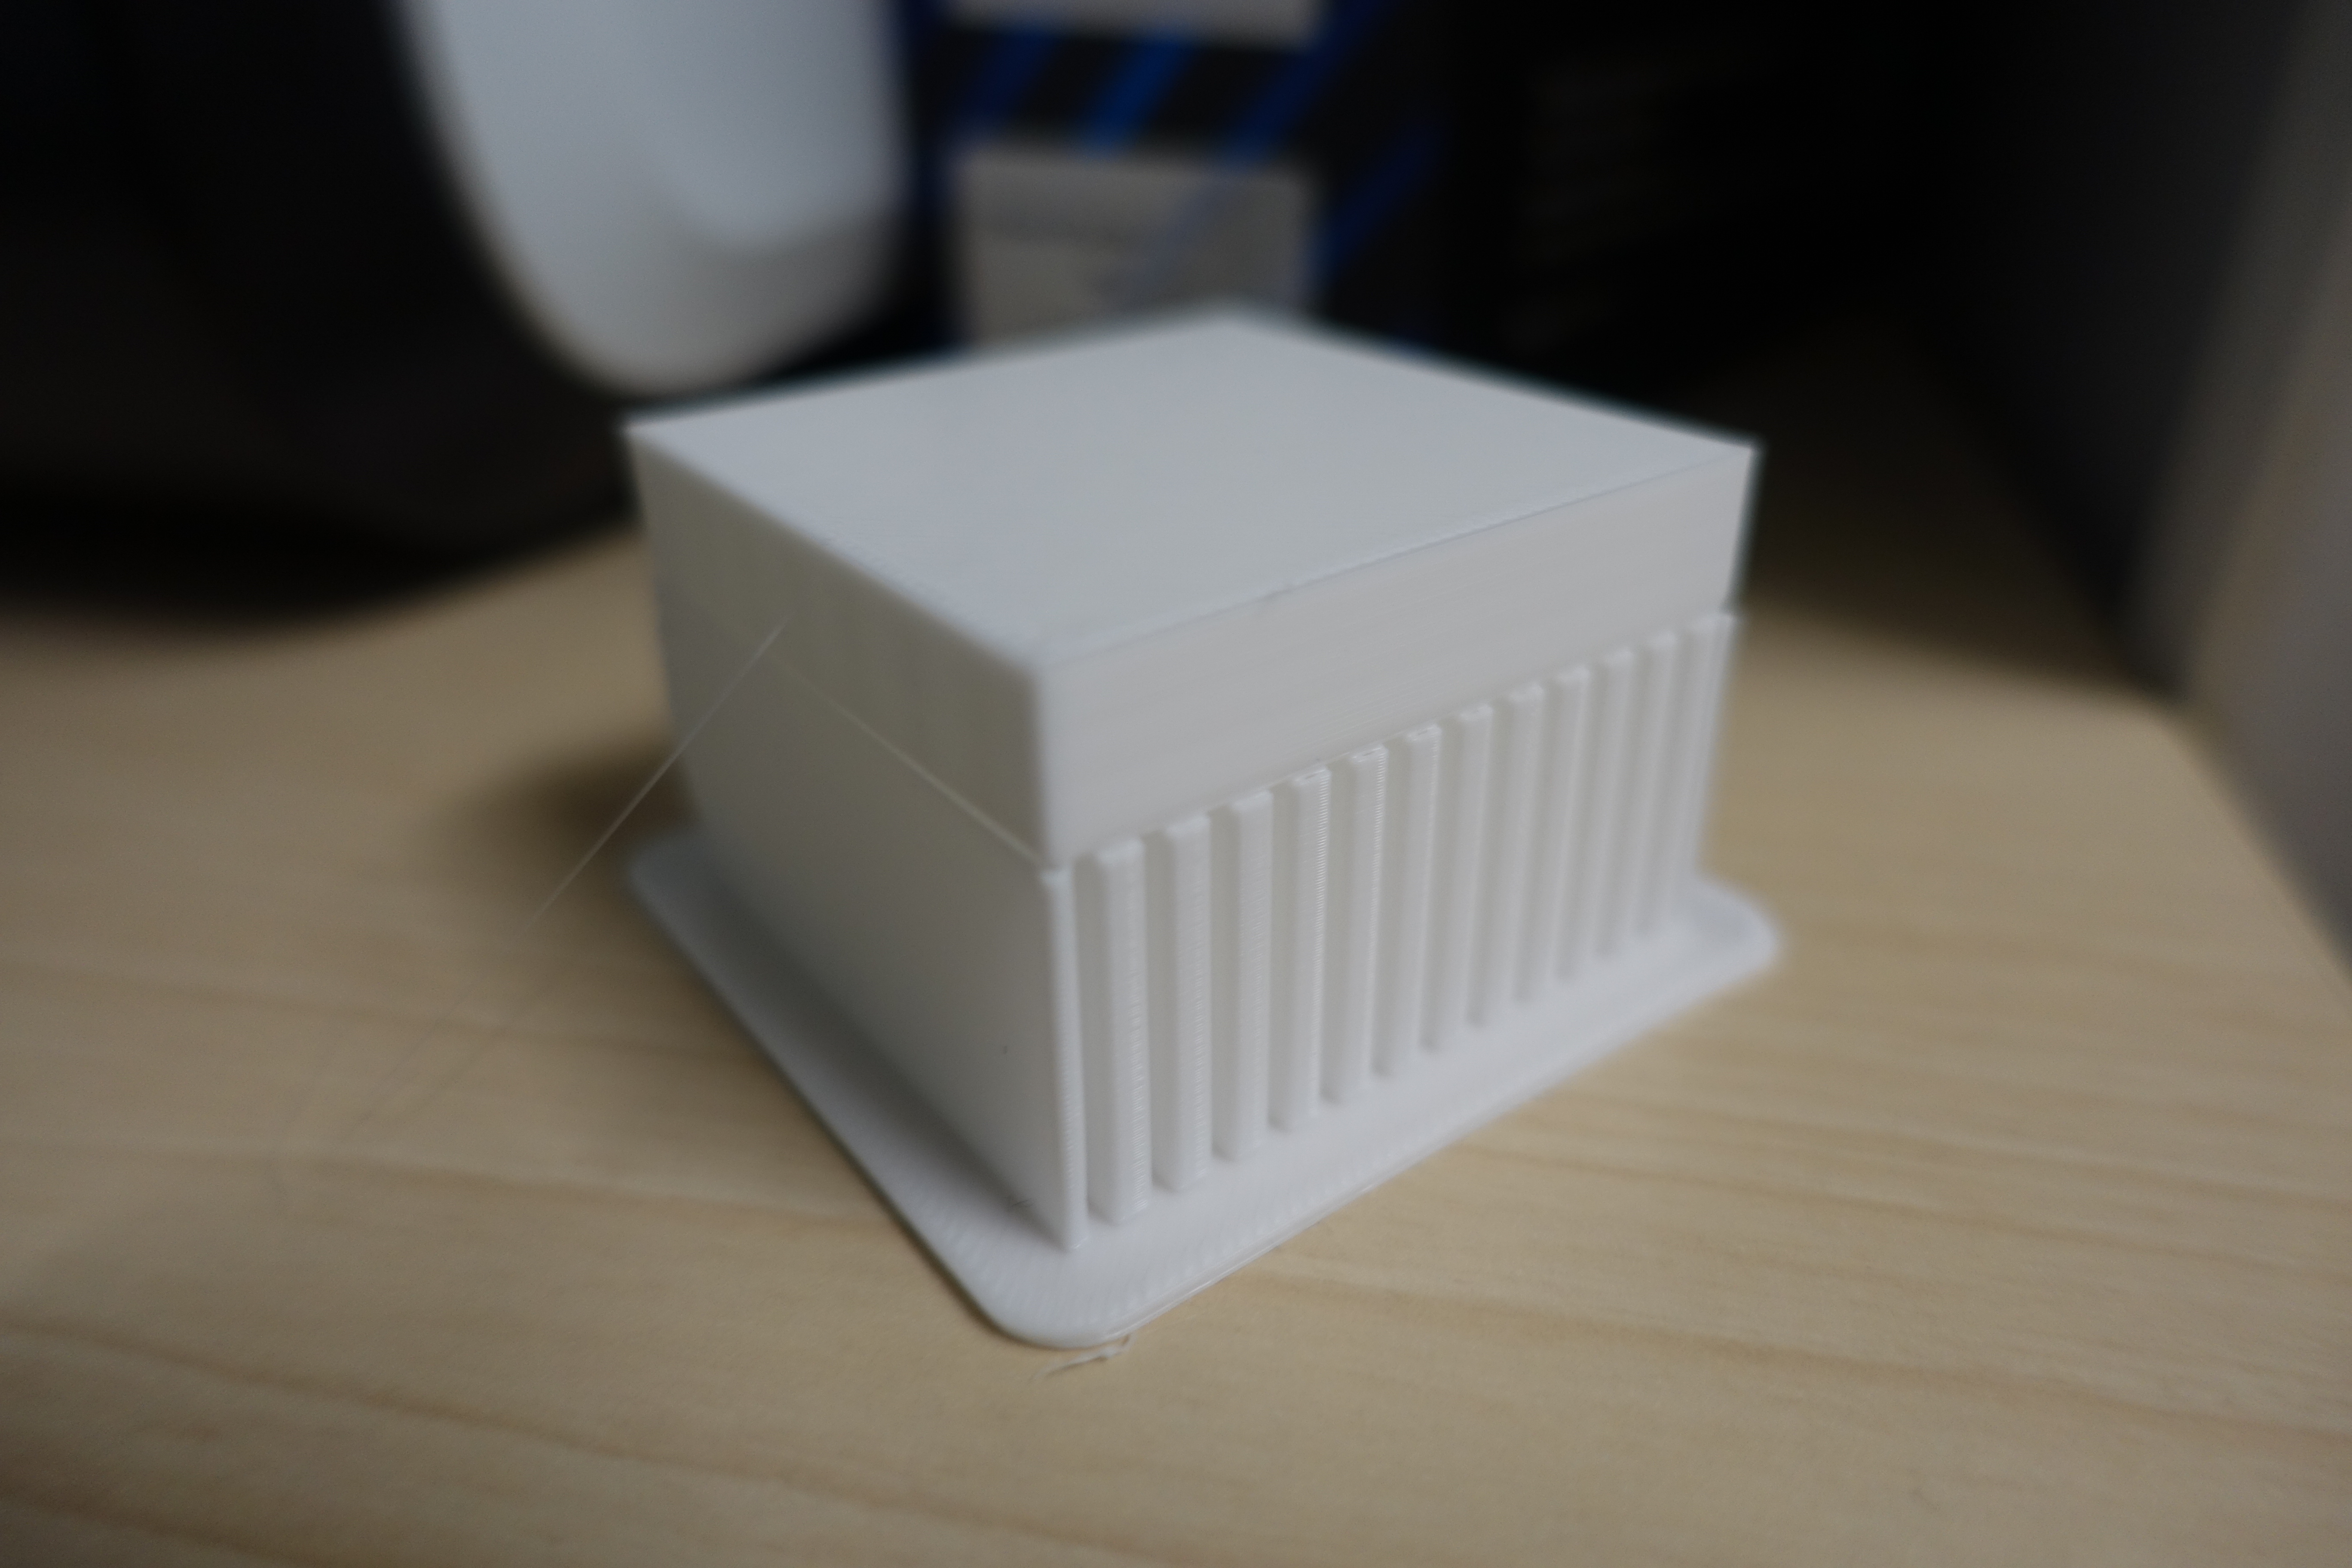
Remove support structuresSupport structures is a pillar printed between the hollow part (overhang) and the stage to prevent extruded filaments from floating during modeling. carefully using nippers or pliers so as not to leave marks on the printed material.
Place: Dengiken's club room
▲support structuresSupport structures is a pillar printed between the hollow part (overhang) and the stage to prevent extruded filaments from floating during modeling. that are about to be removed
How was your first trial with a 3D printer? Did you make the object well? Some people may find making an object with the software difficult, but I hope you enjoyed making your original object.
Place: Dengiken's club room
3D printing is a continuous process of trial and error. "What design would make things sturdy?" "What printing settings would be most cost-effective?" "What resin is appropriate for the target object?"

Source:Fusion 360
The best part of a 3D printer is that you can actually create and test your ideas, not just a theory, and expand your imagination, making it real! So we hope you will continue enjoying using a 3D printer that gives you many ideas!